Make (formerly Integromat) is an integration tool that allows you to create "Scenarios" and configure "Modules" to determine when and how Make should integrate different software and trigger automation processes.
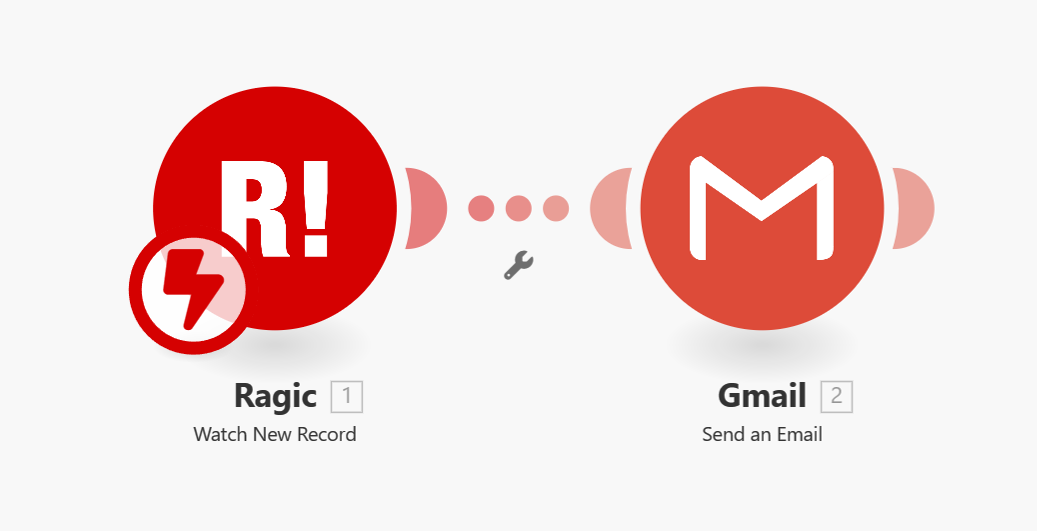
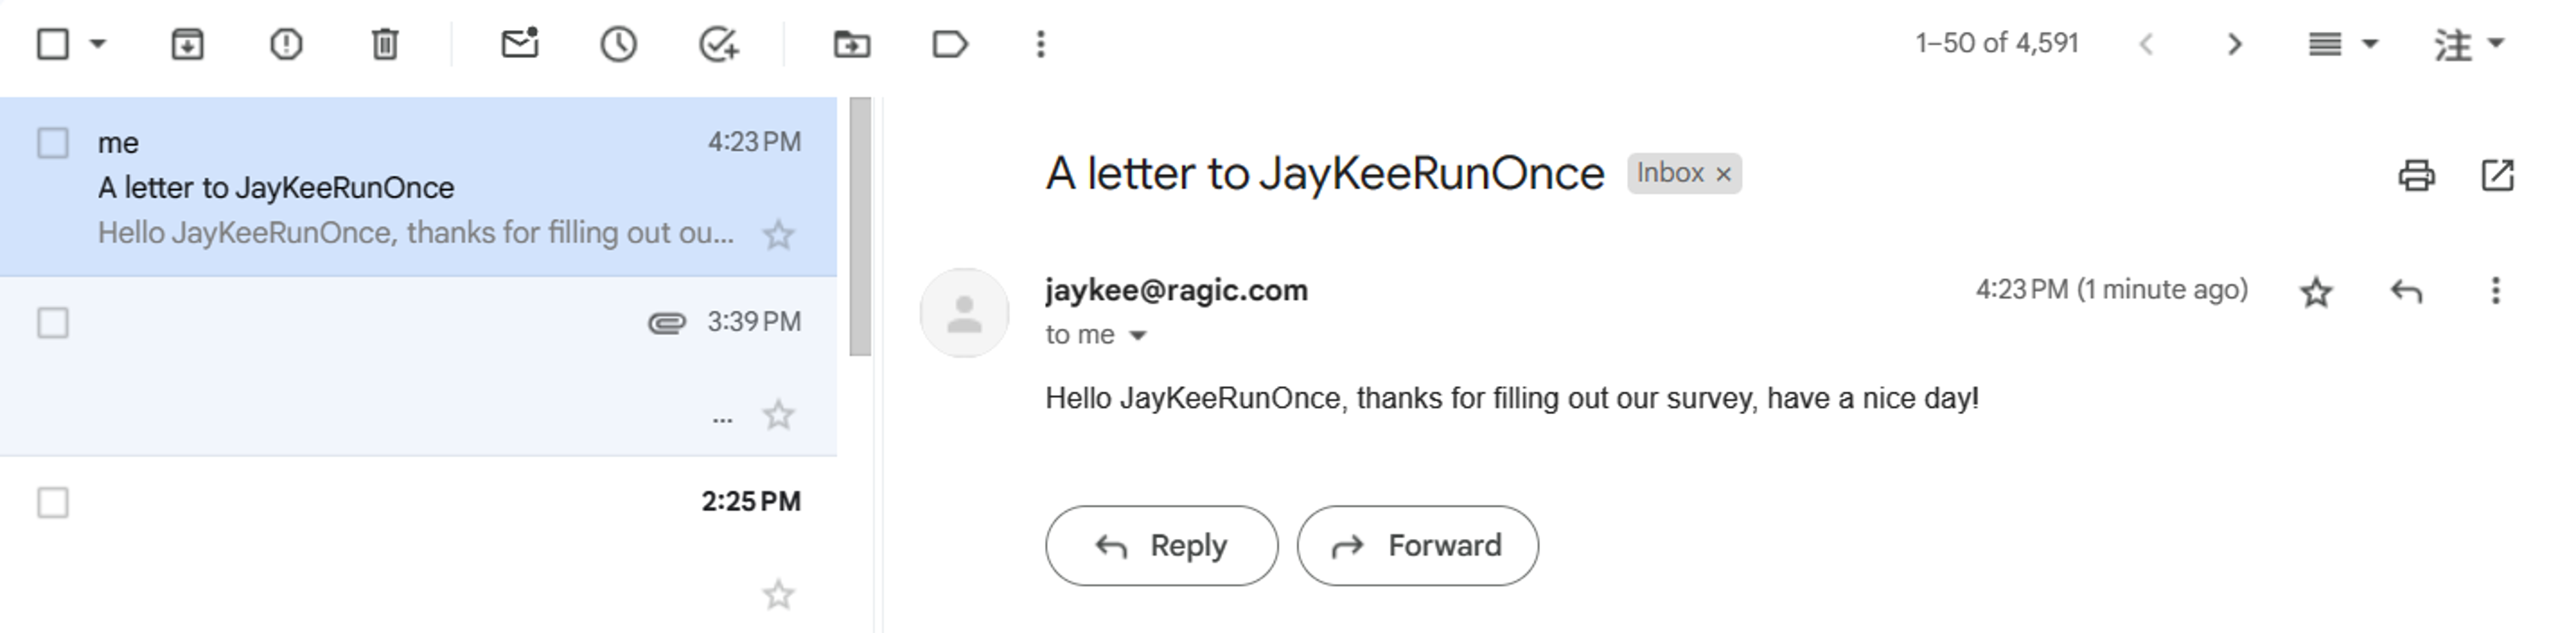
For example, if you design a questionnaire in Ragic and want to send a thank-you email to respondents after completing it, you can create an automation process like this:
Make stands out from other integration tools like Zapier because it allows you to build not only simple linear integrations but also complex structures resembling tree diagrams or nested structures. Make can be a more convenient choice if you want to trigger multiple actions simultaneously and define the order and conditions of the automation process using built-in paths and filtering features.
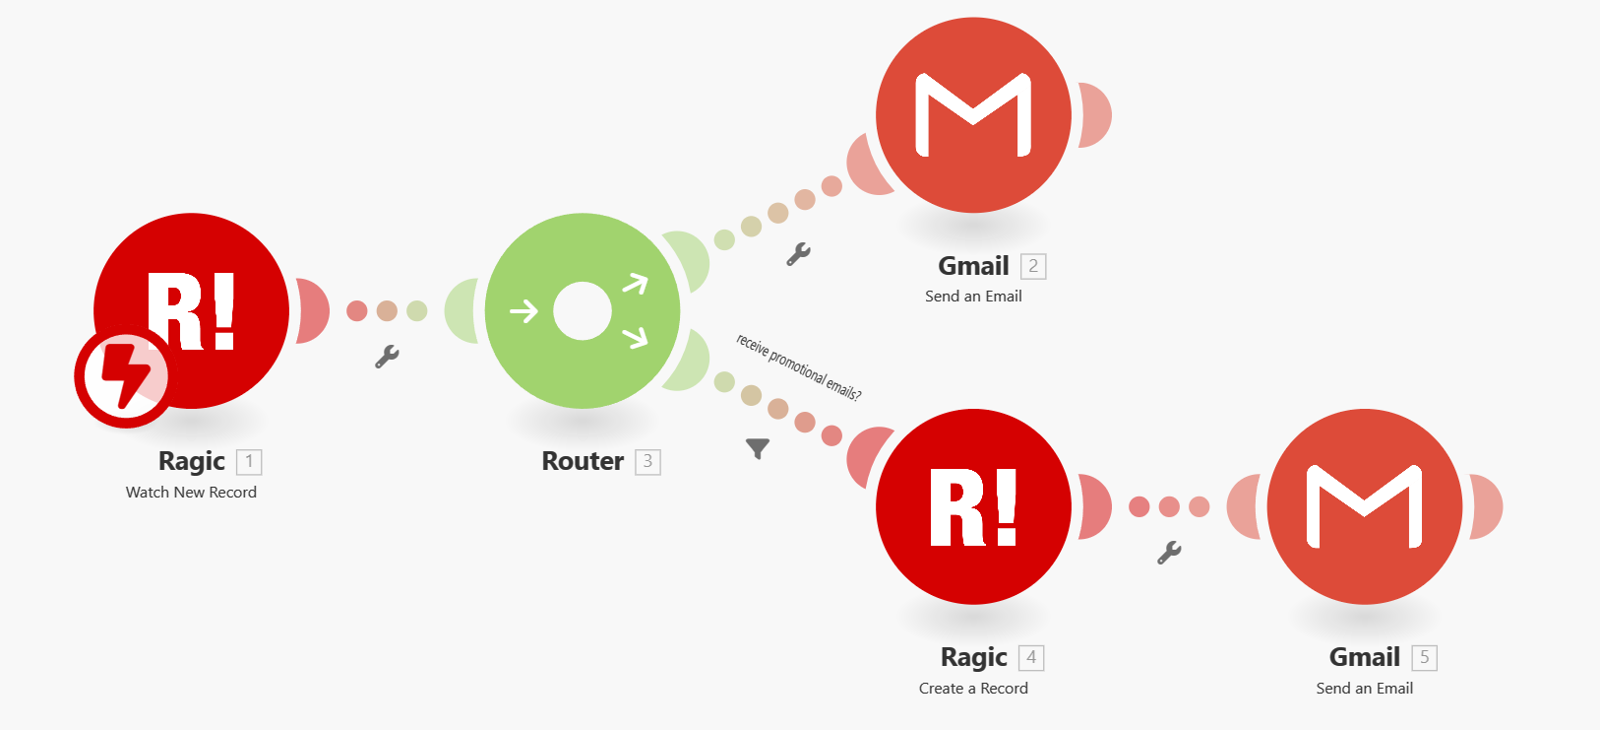
For instance, if your questionnaire asks respondents if they want to receive promotional newsletters, you might need to automatically create records for customers who agree to subscribe to the newsletter, and then send a confirmation email. The process could look like this:
Next, we'll provide an introduction and demonstration of both basic integration (sending an email automatically when new data is created) and advanced integration (sending an email and creating records based on conditions).
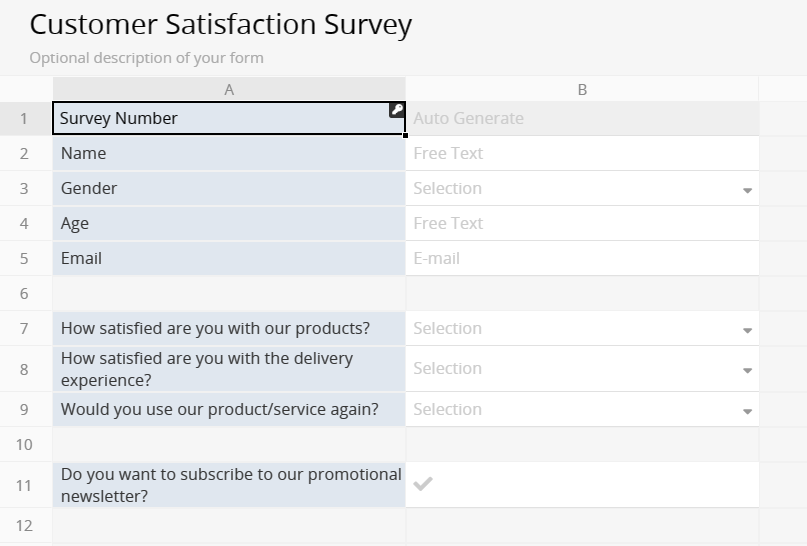
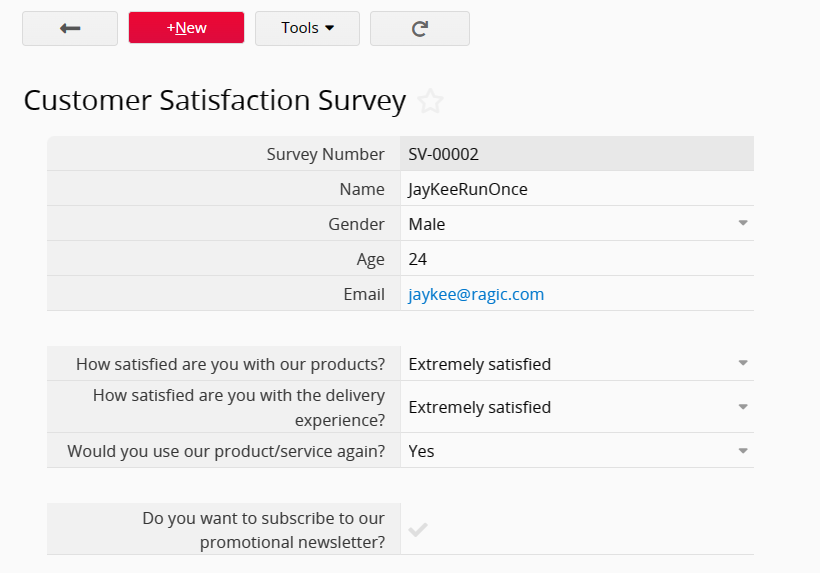
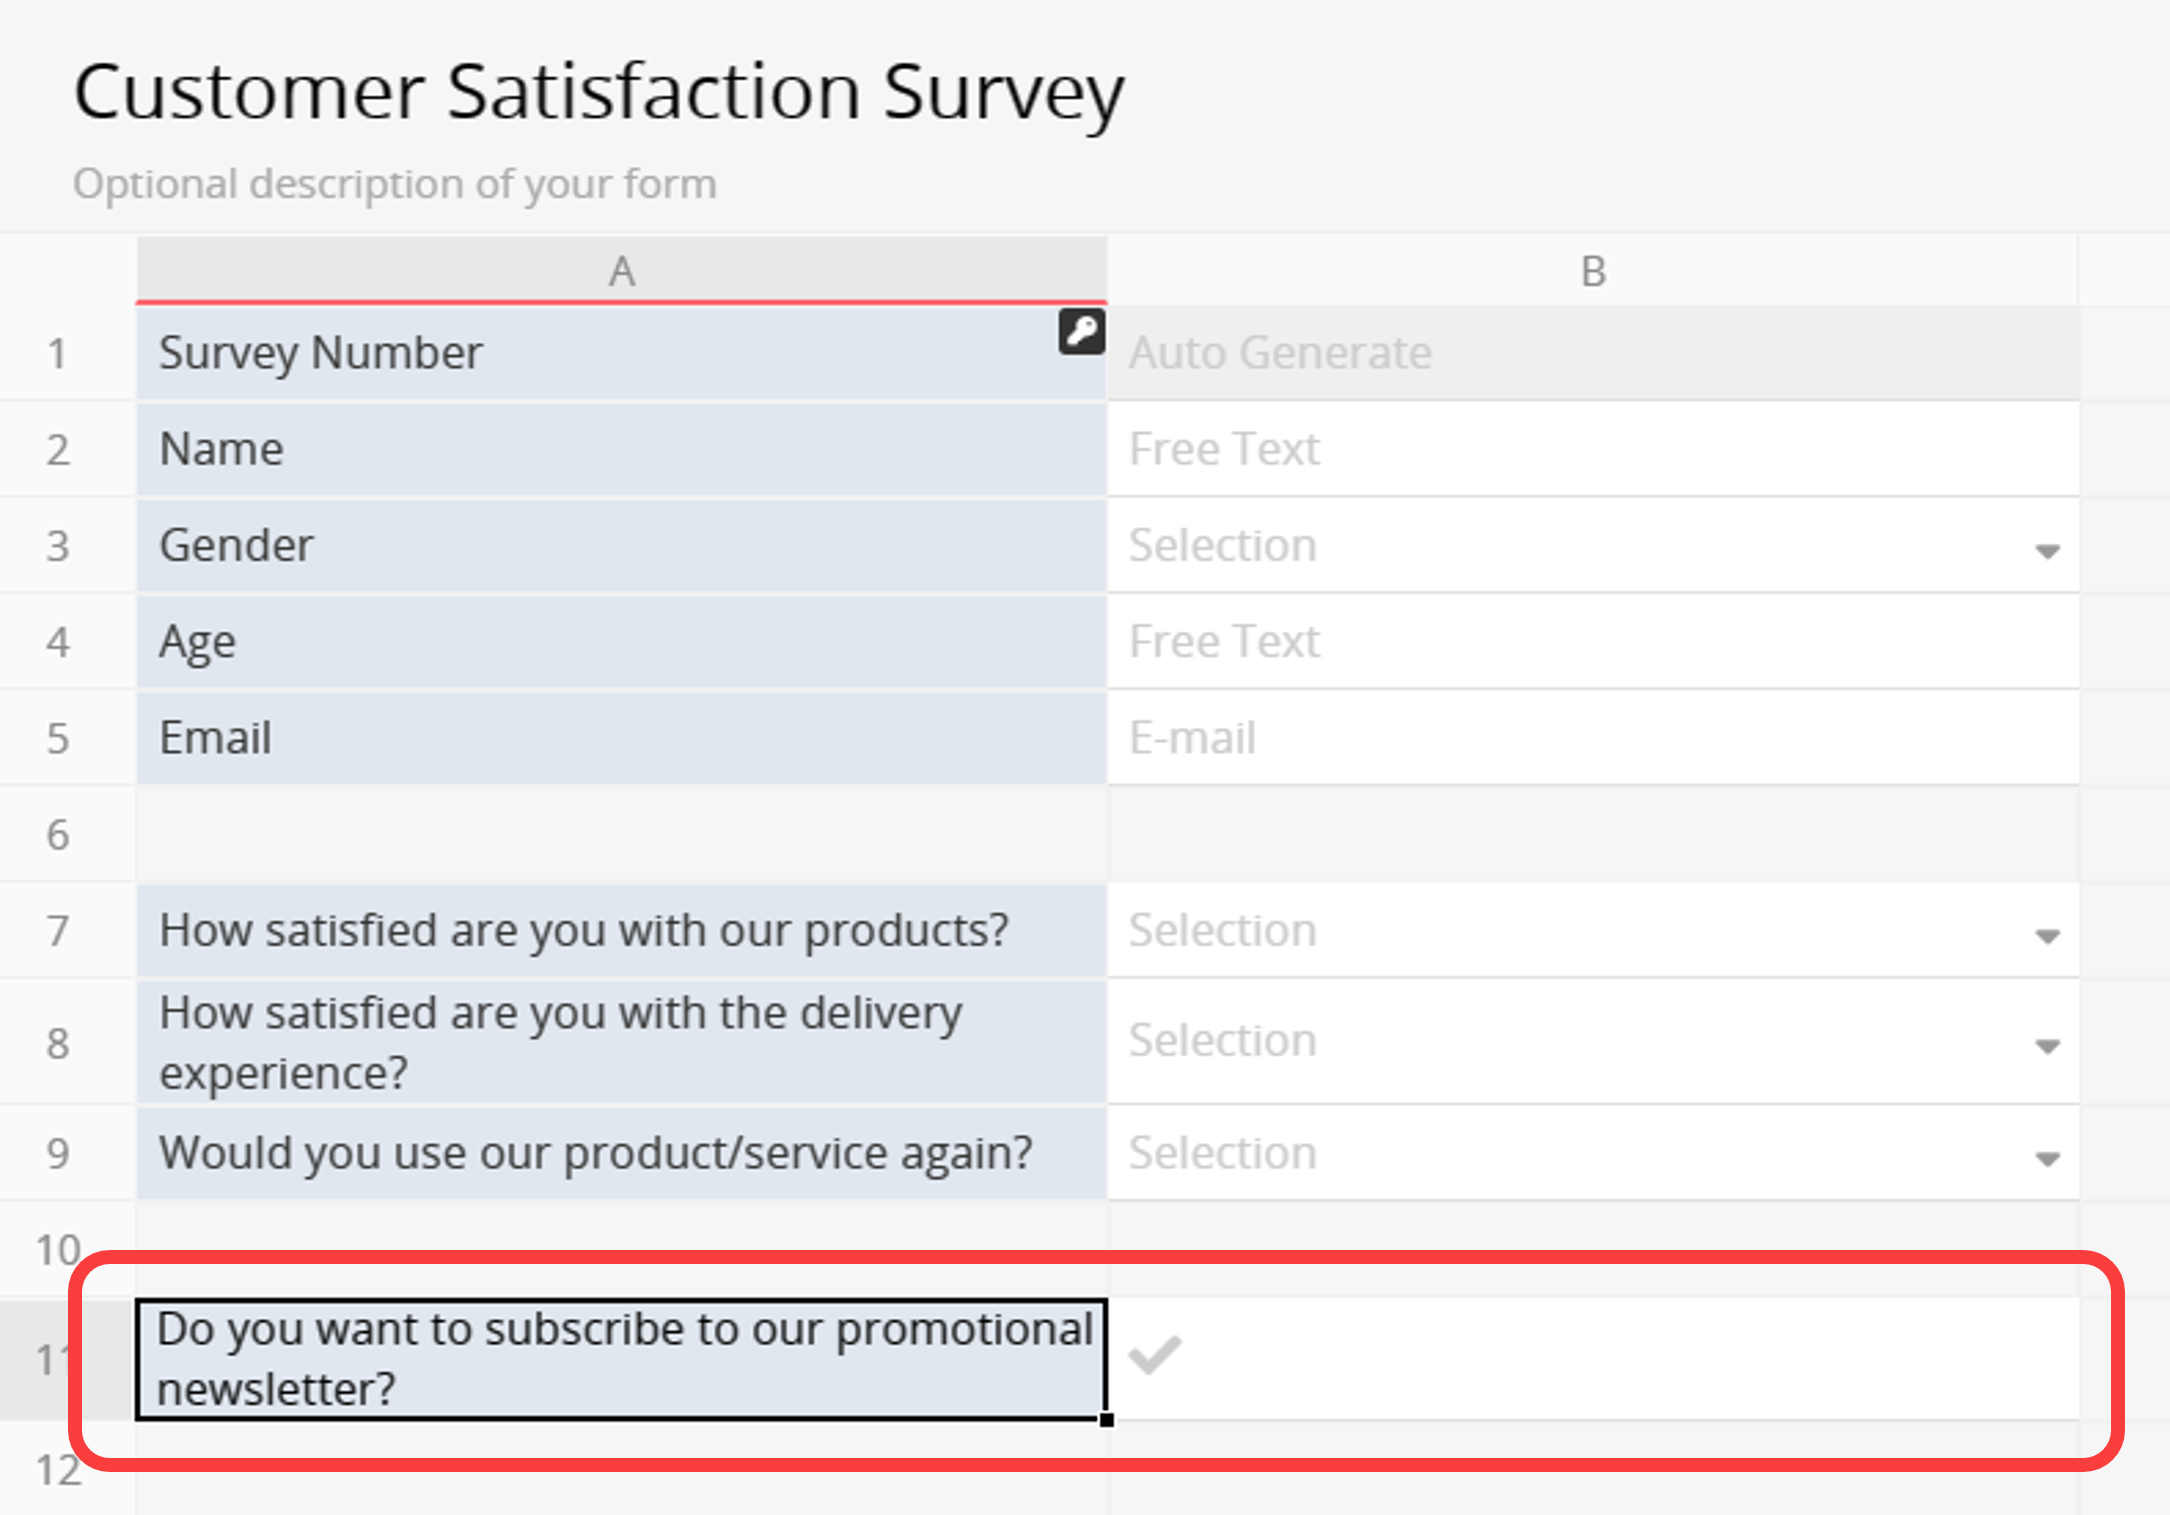
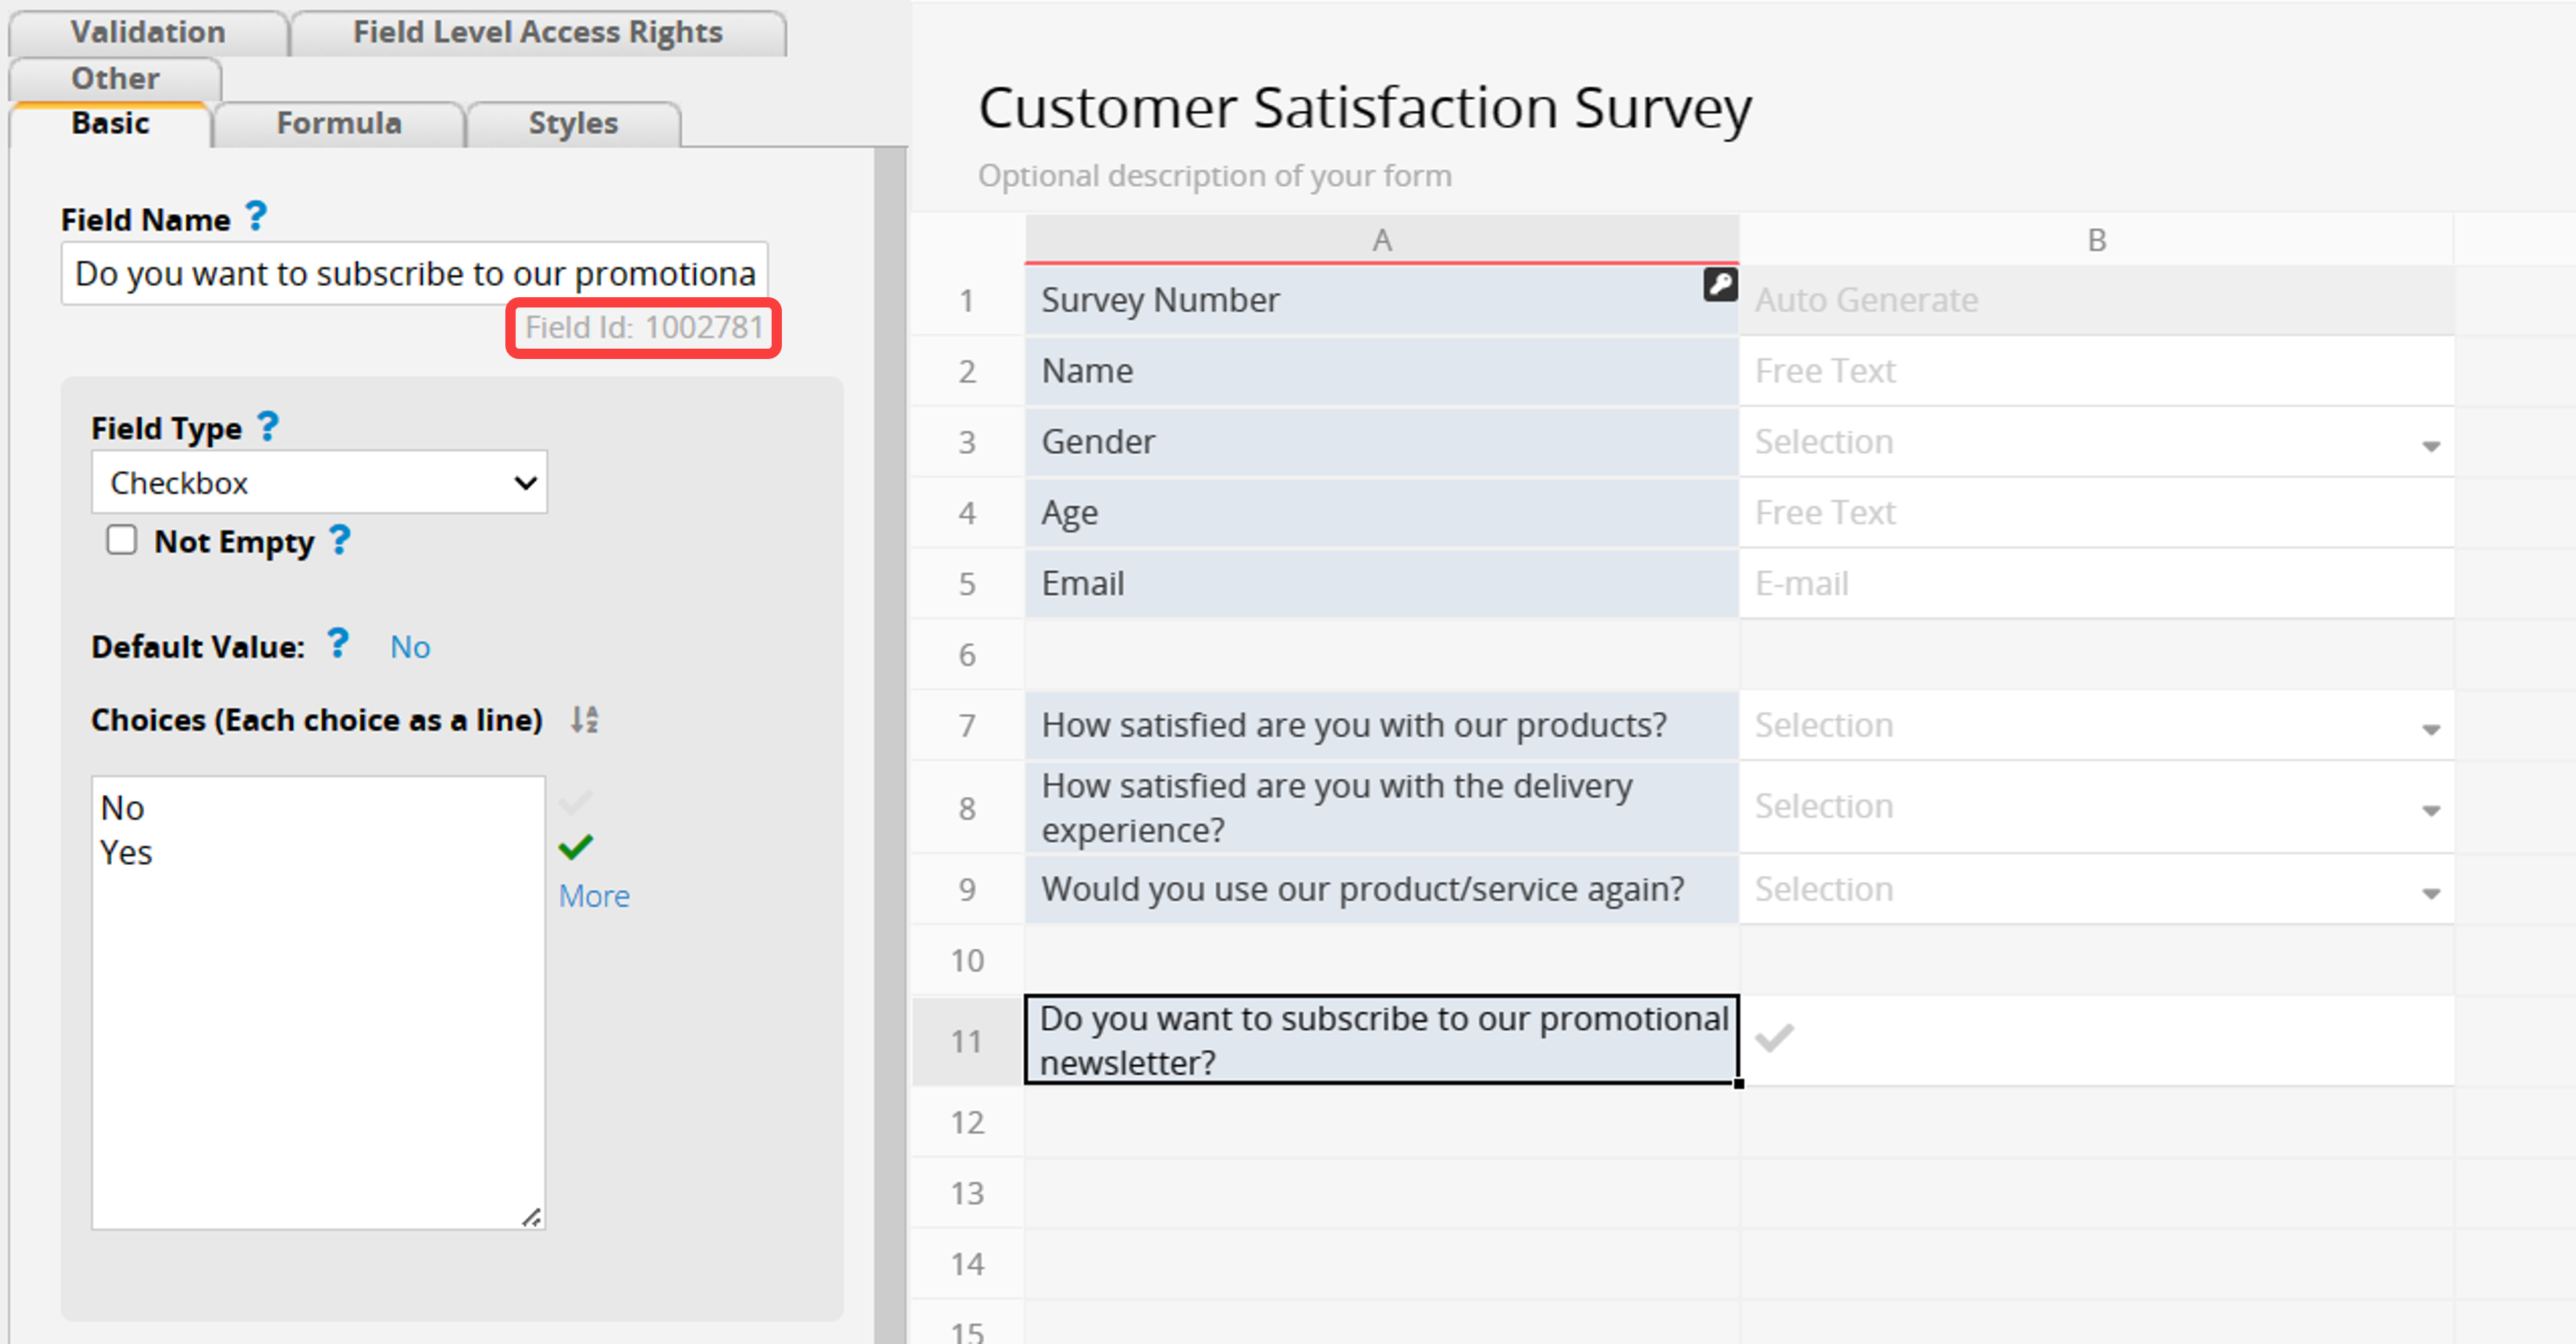
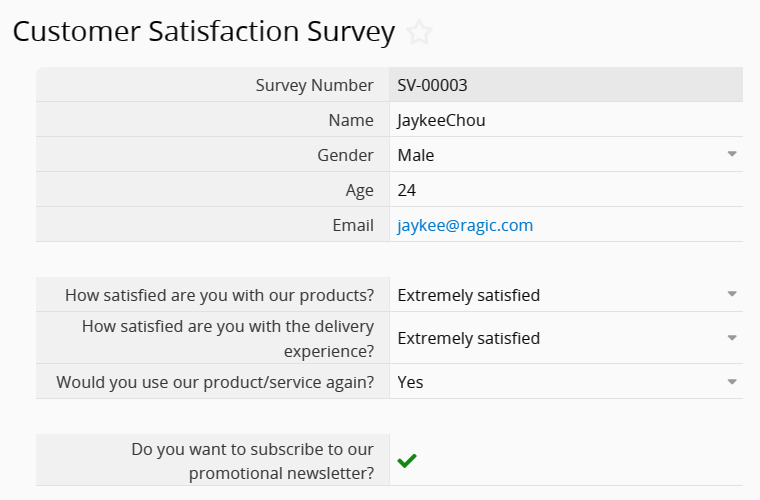
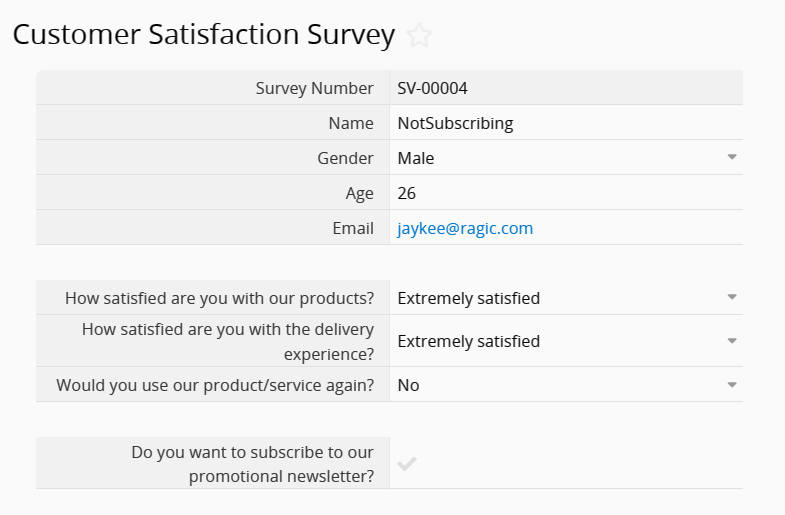
Create a sheet in Ragic according to your needs. As an example, let's design a "Customer Satisfaction Survey" with the following fields:
Log in to Make, and if you don't have an account, you can register here. Once logged in, you will be redirected to the Make dashboard.
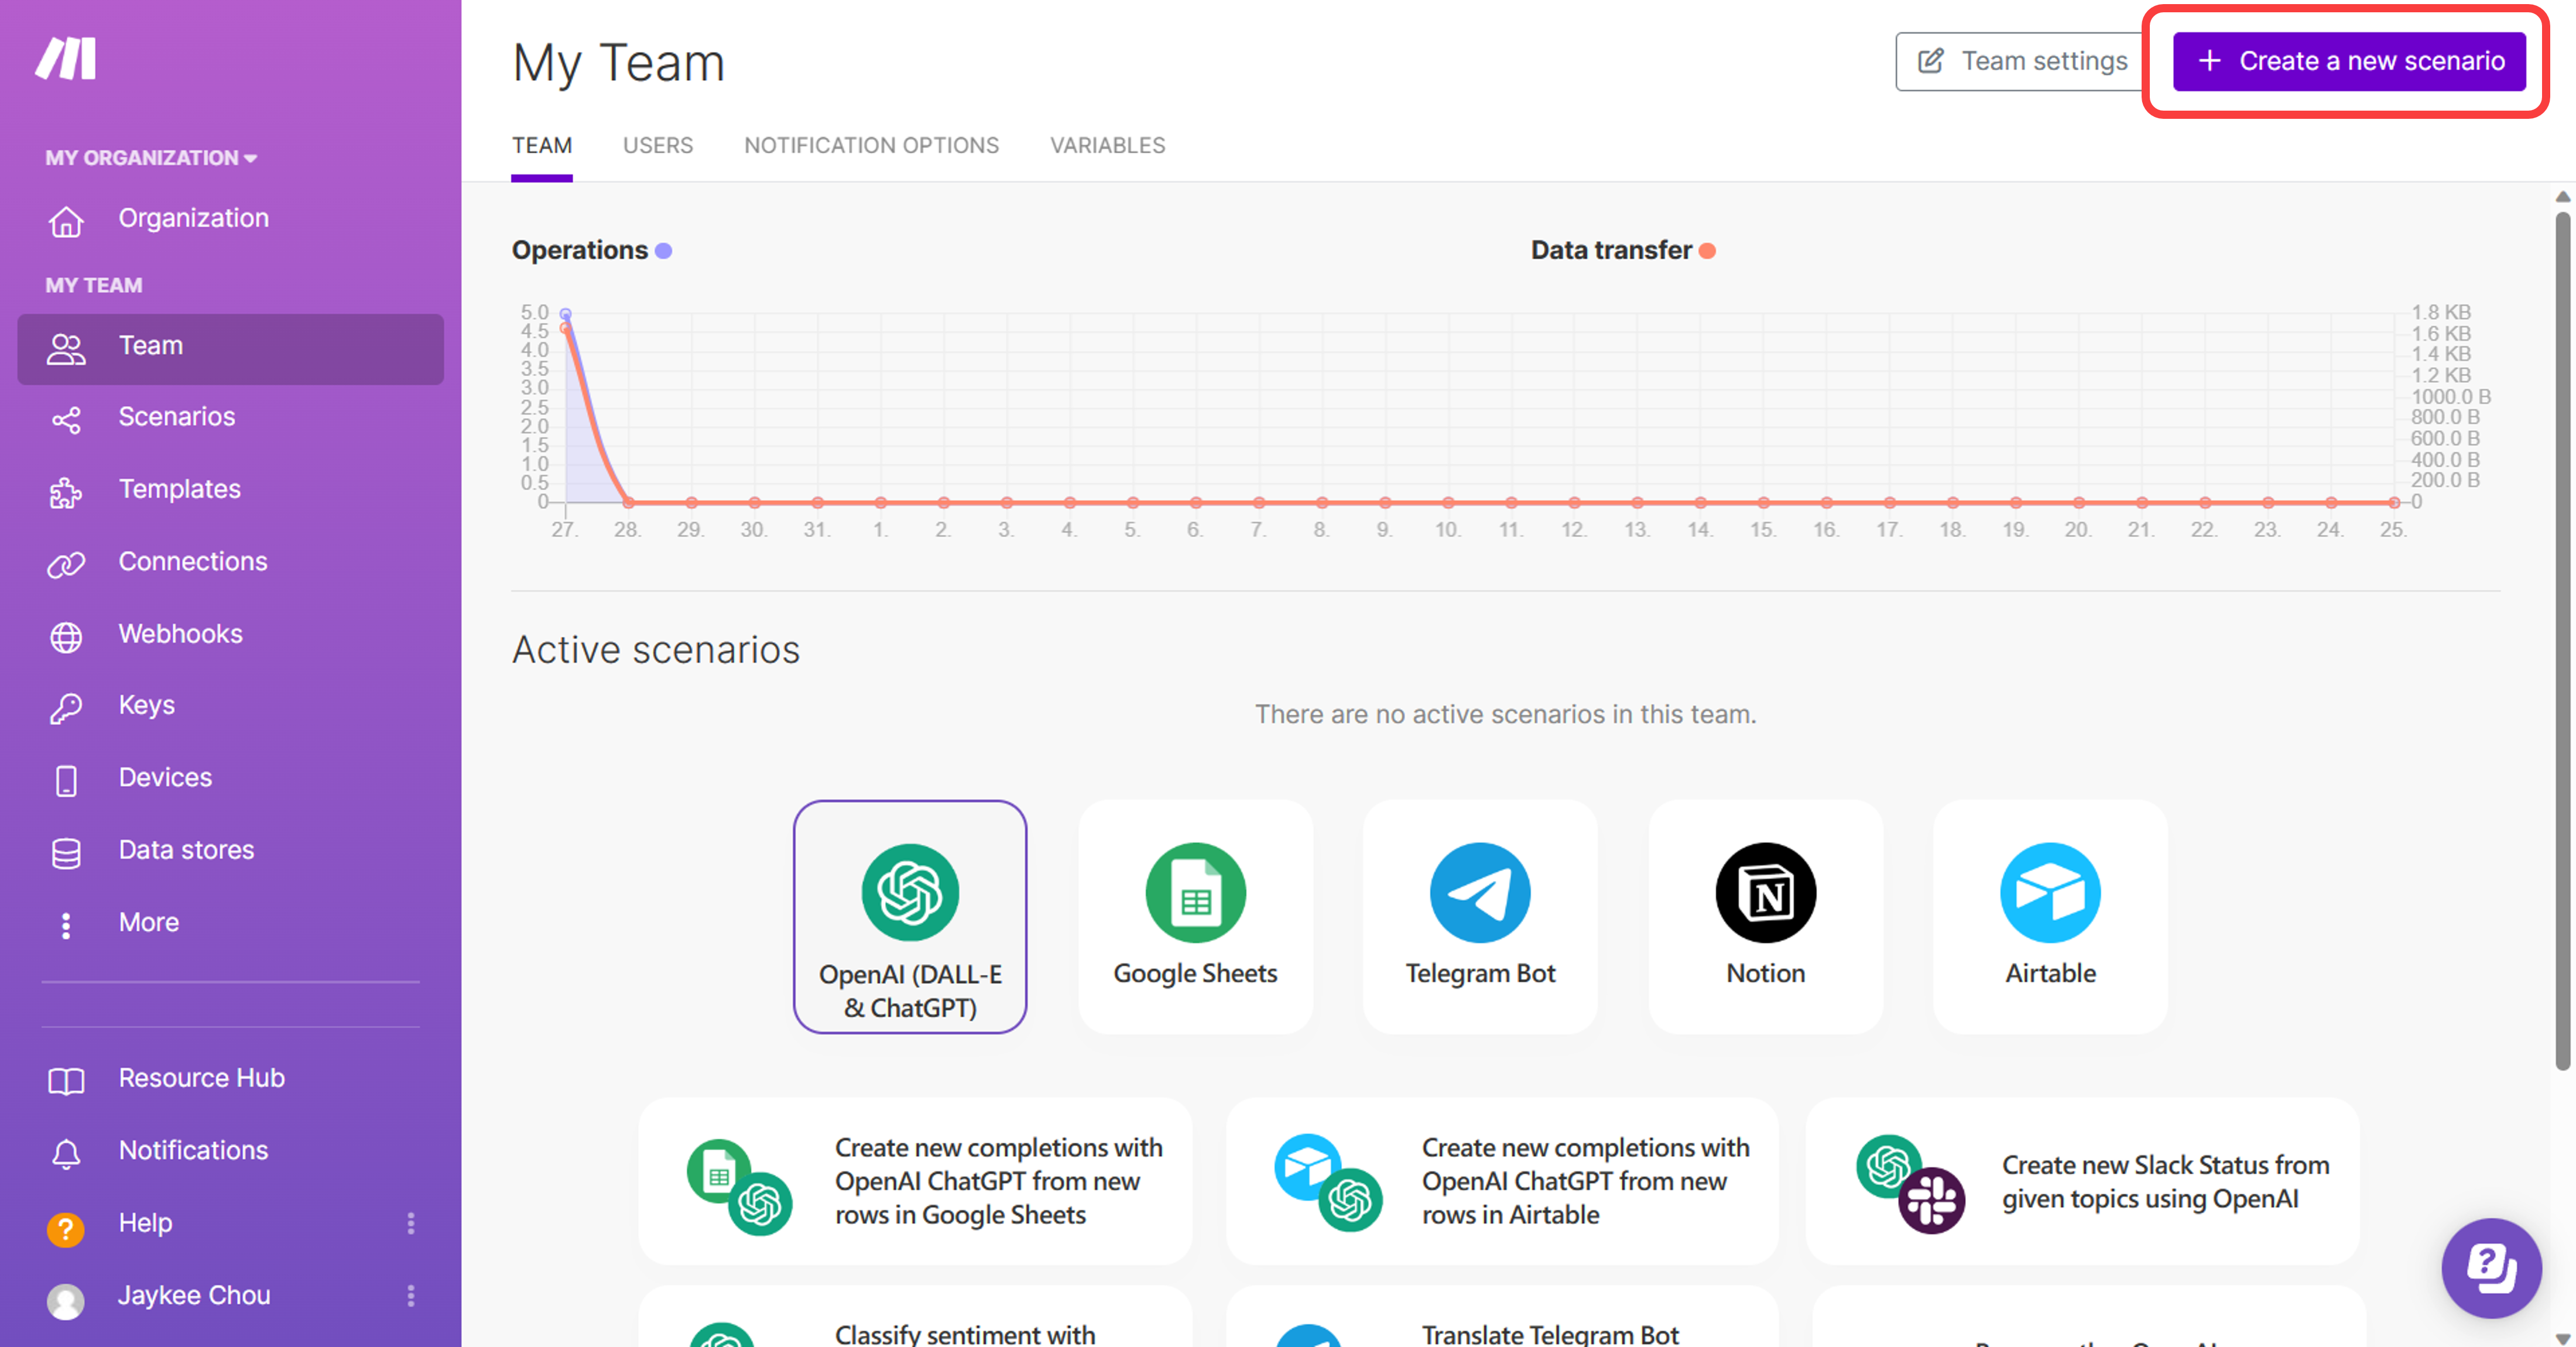
Click "Create a new scenario" in the top right corner of the dashboard.
After creating the scenario, click the "+" symbol in the editor to select the tool and conditions that will trigger the scenario.
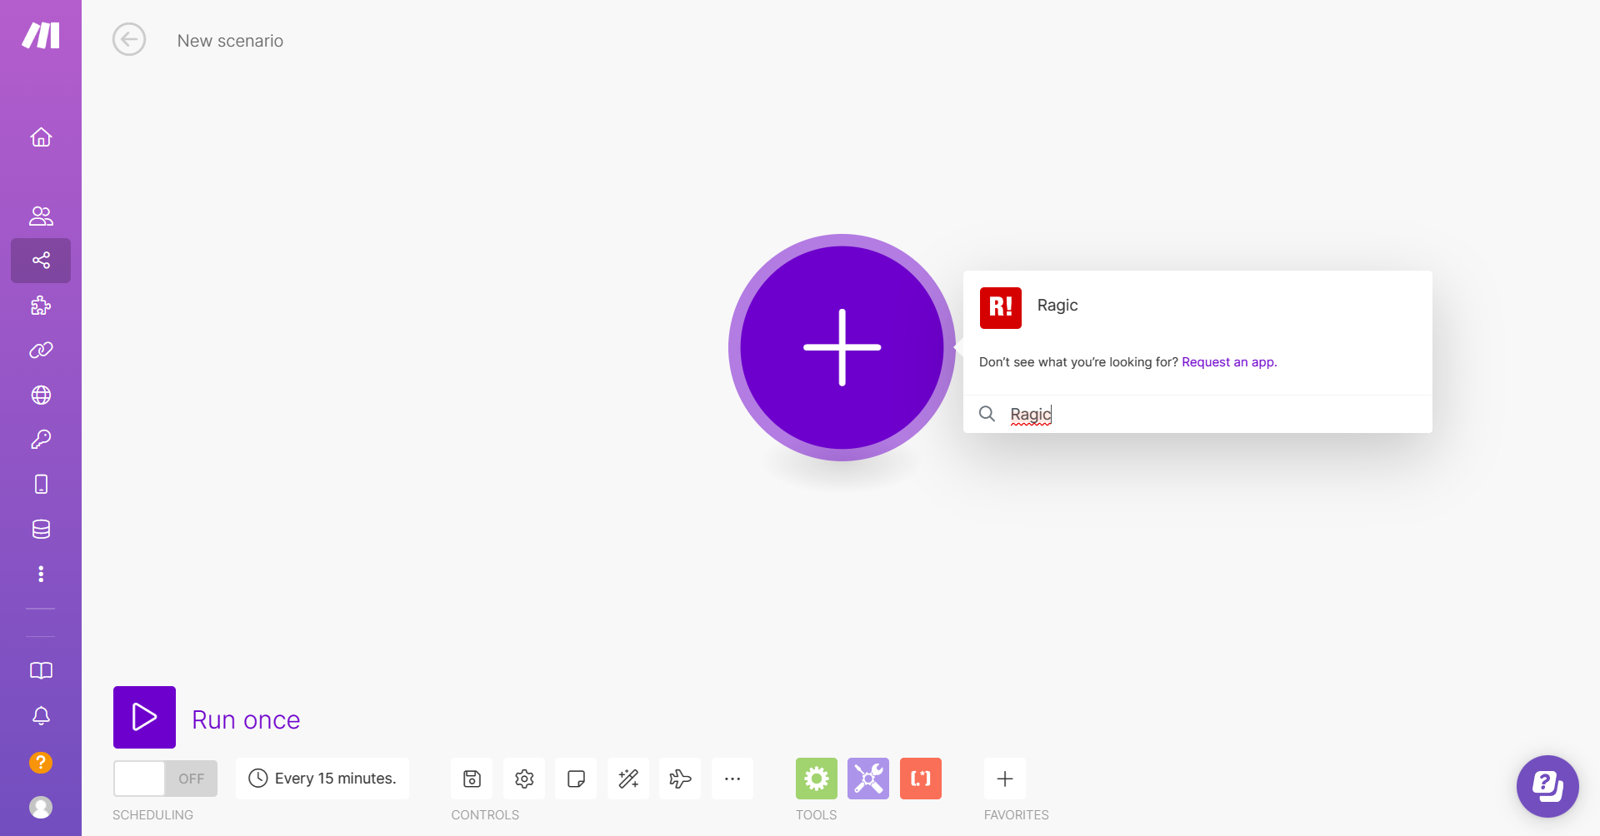
Since we want the process to trigger when there is a new record in the Ragic sheet, select Ragic and then "Watch New Record".
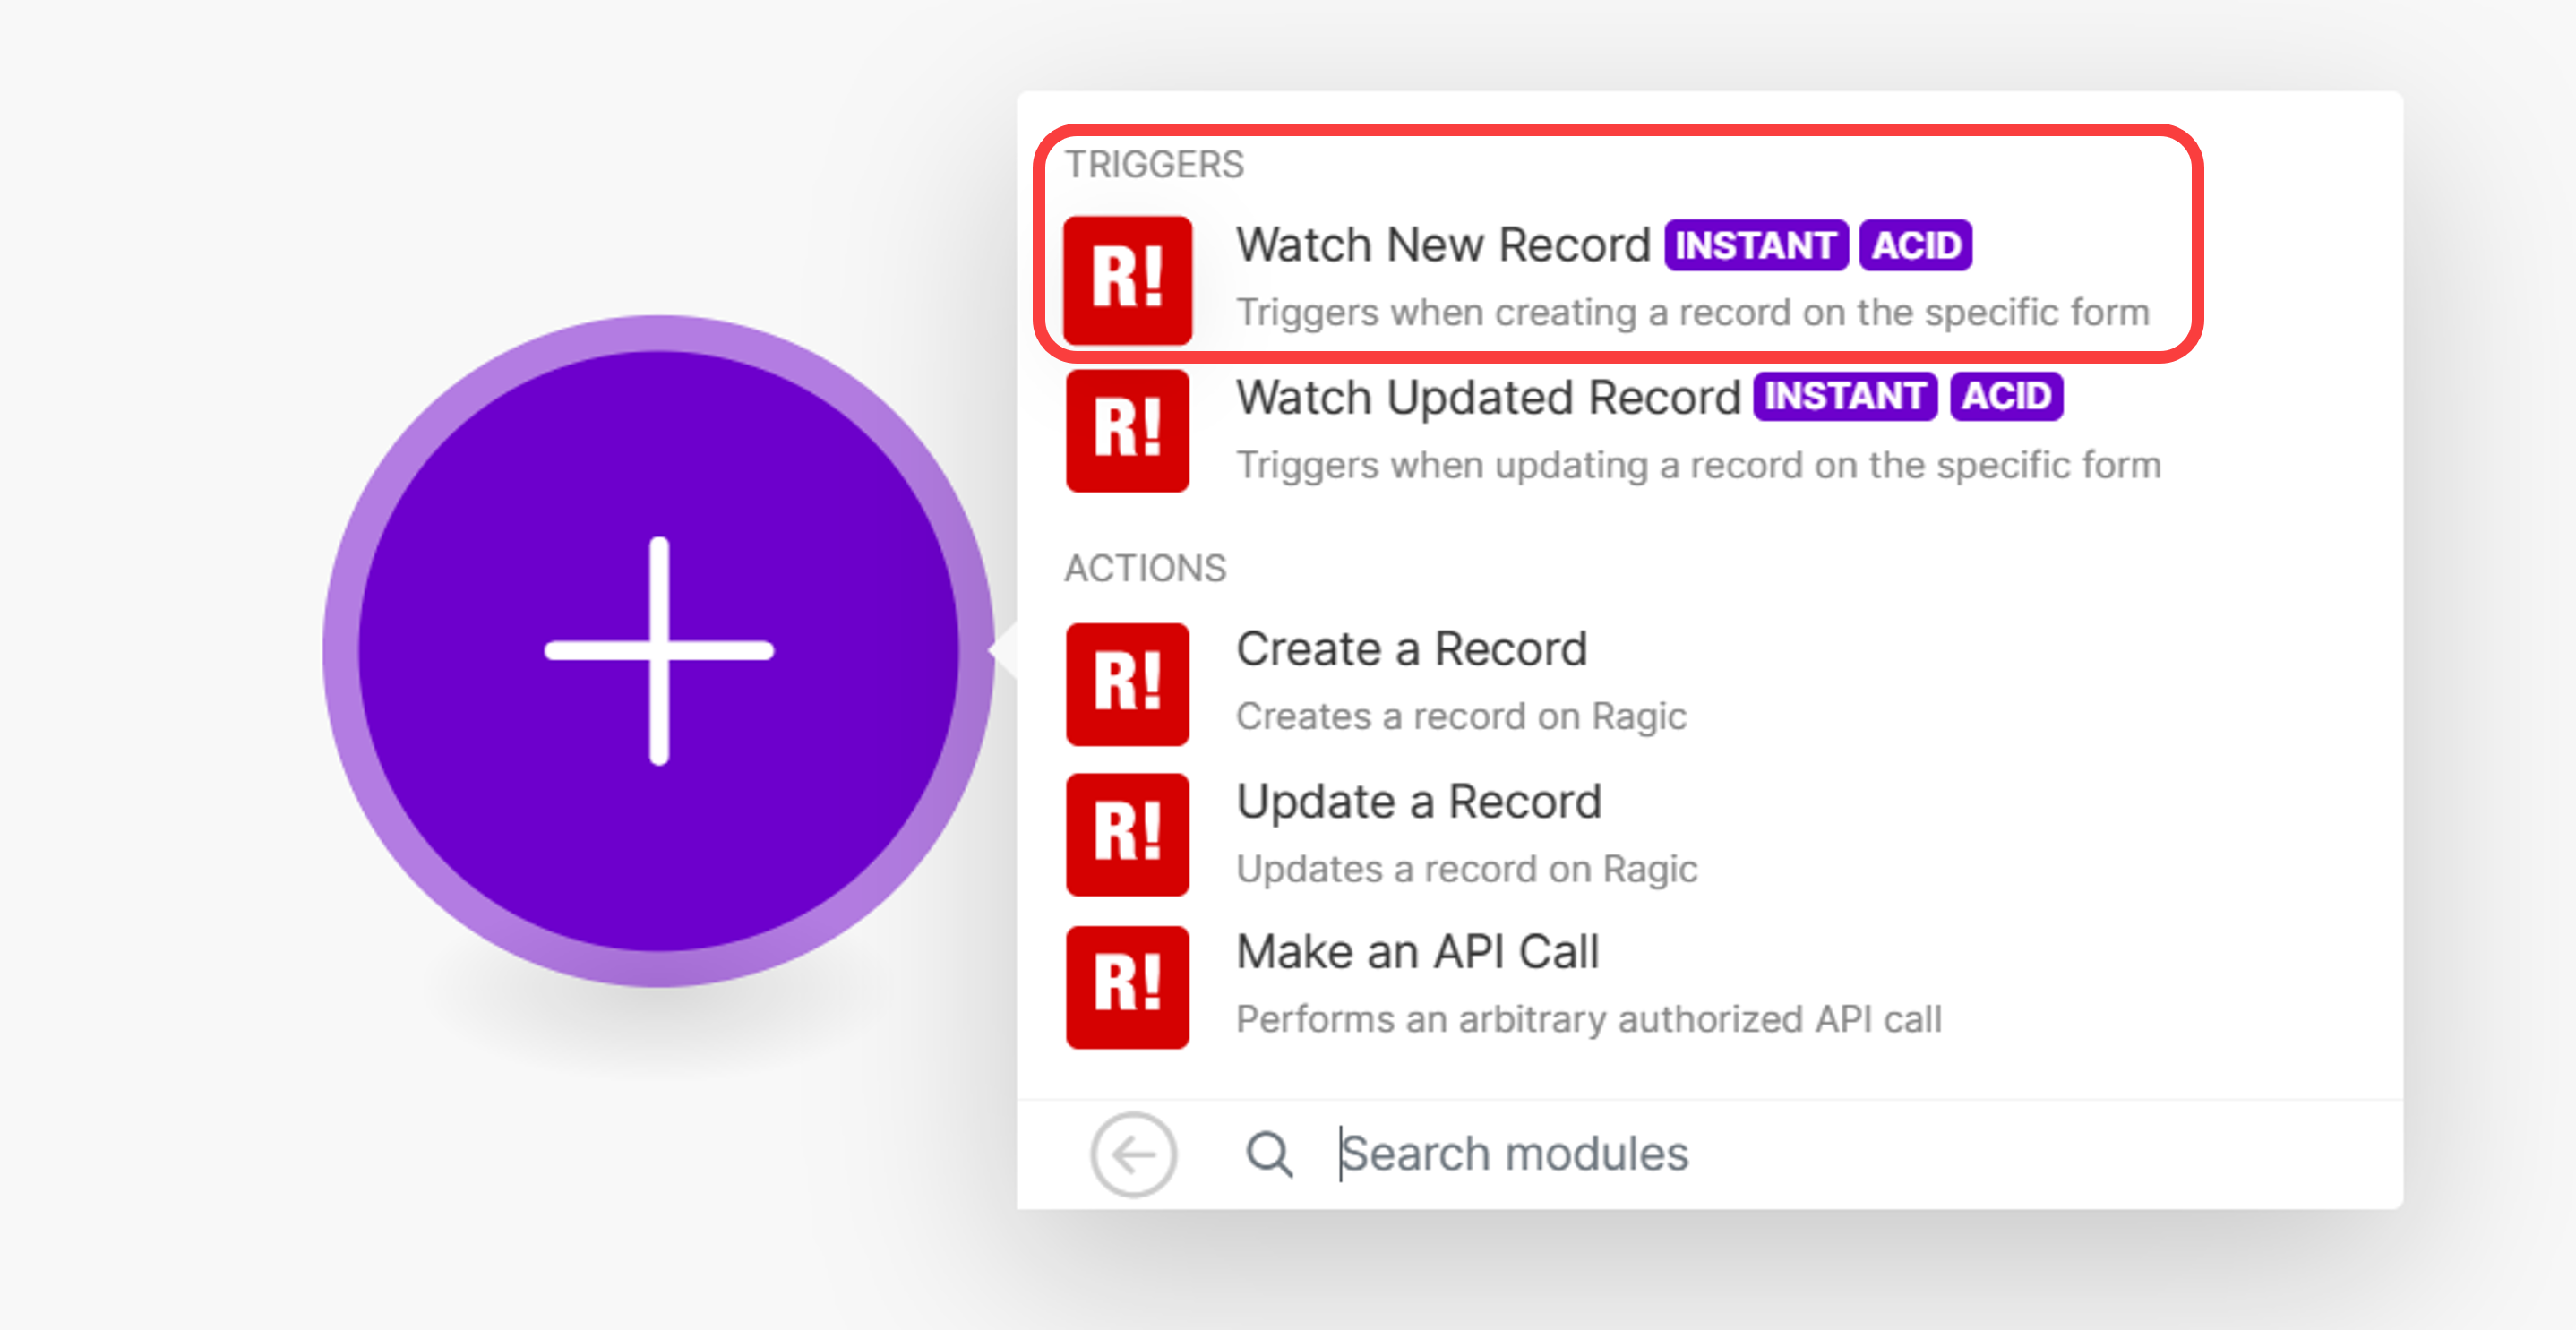
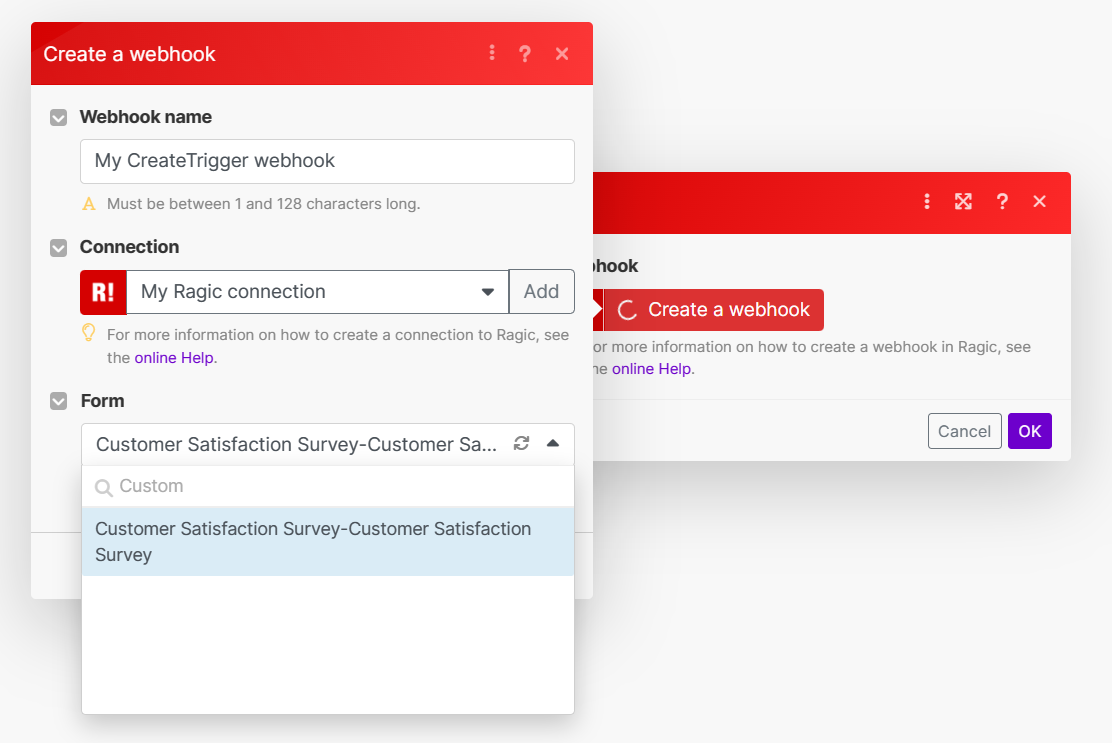
Make will ask you to create a Webhook in the Ragic database.
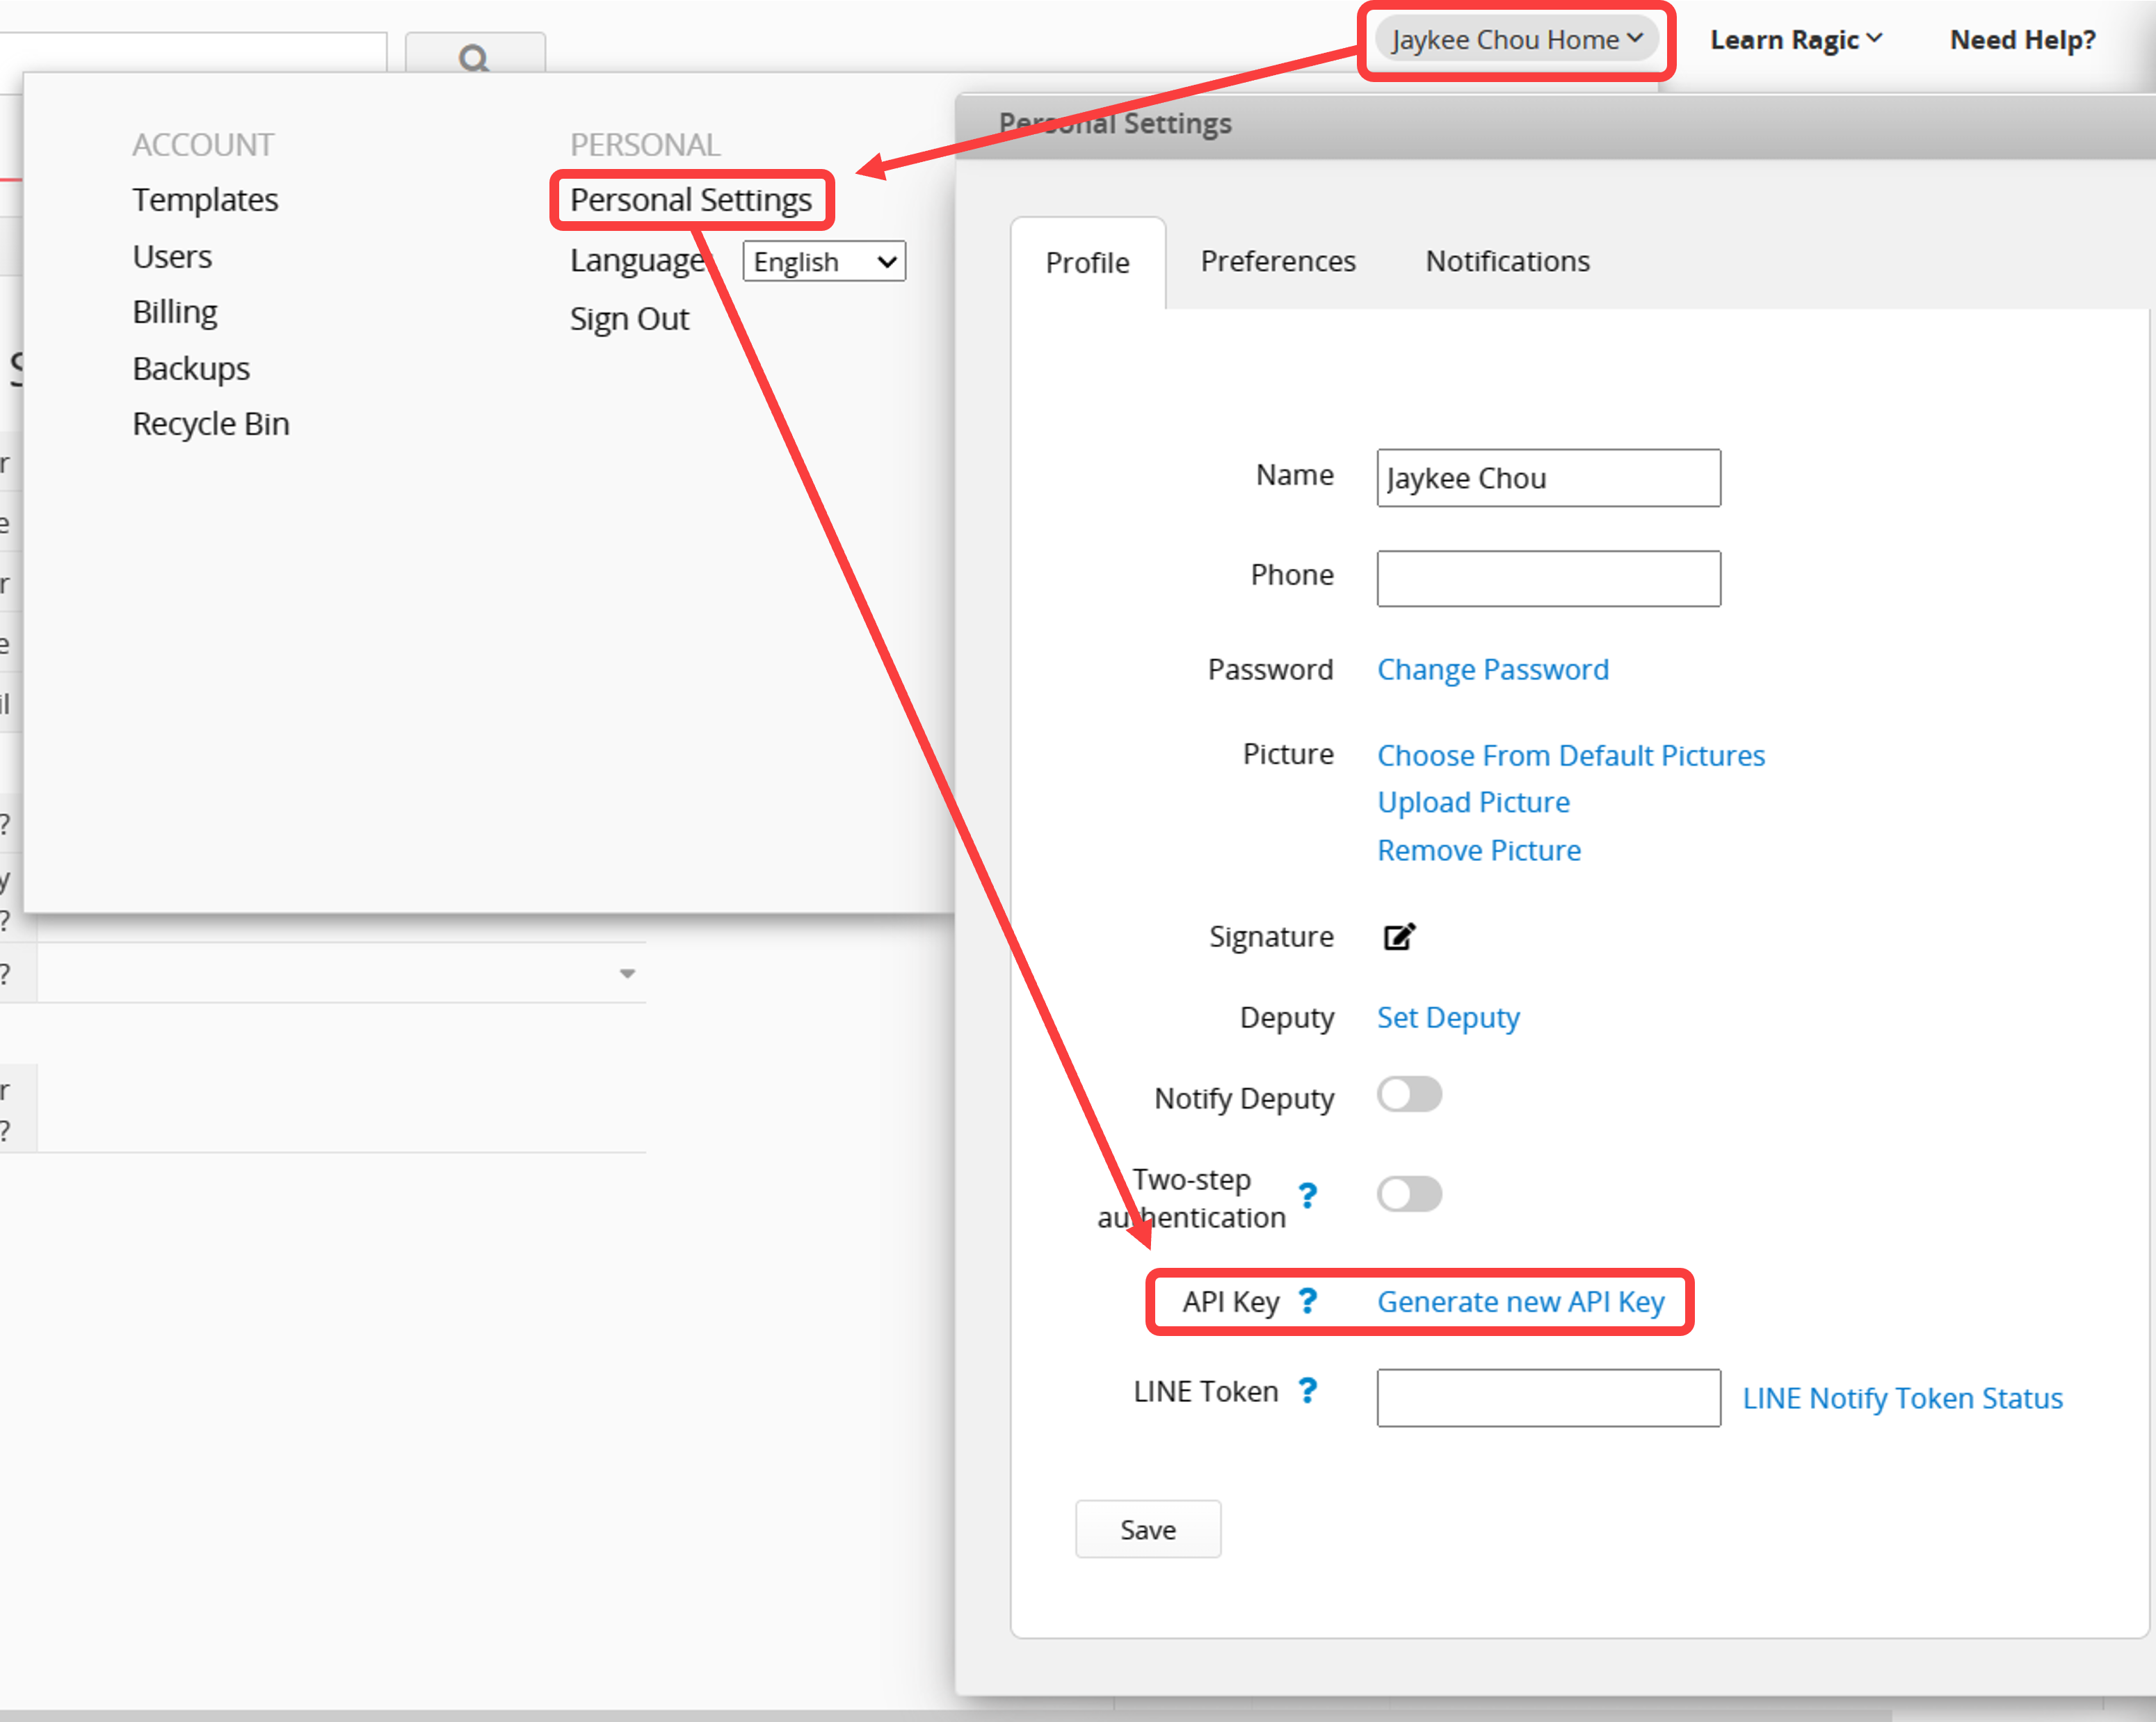
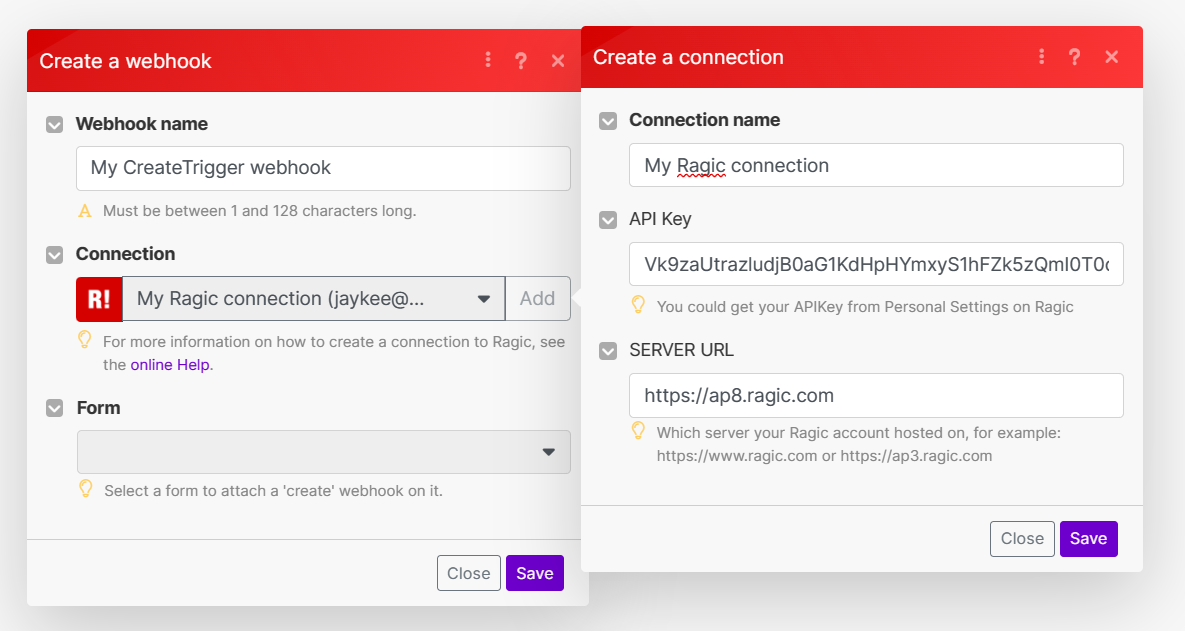
To do so, you’ll need to input your Ragic account's API Key and server address. Generate a new API Key in your Ragic account's settings and paste it into Make.
Also, enter the server address (the part before your database account in the URL). For instance, the URL of the example sheet looks like this:

Therefore, the server address should be “https://ap8.ragic.com”.
Once you finish connecting your database, select the sheet you want to integrate and save the configuration.
To update the trigger module’s information, you’ll need to run the scenario once first. Click "Run once" in the editor's bottom left corner.
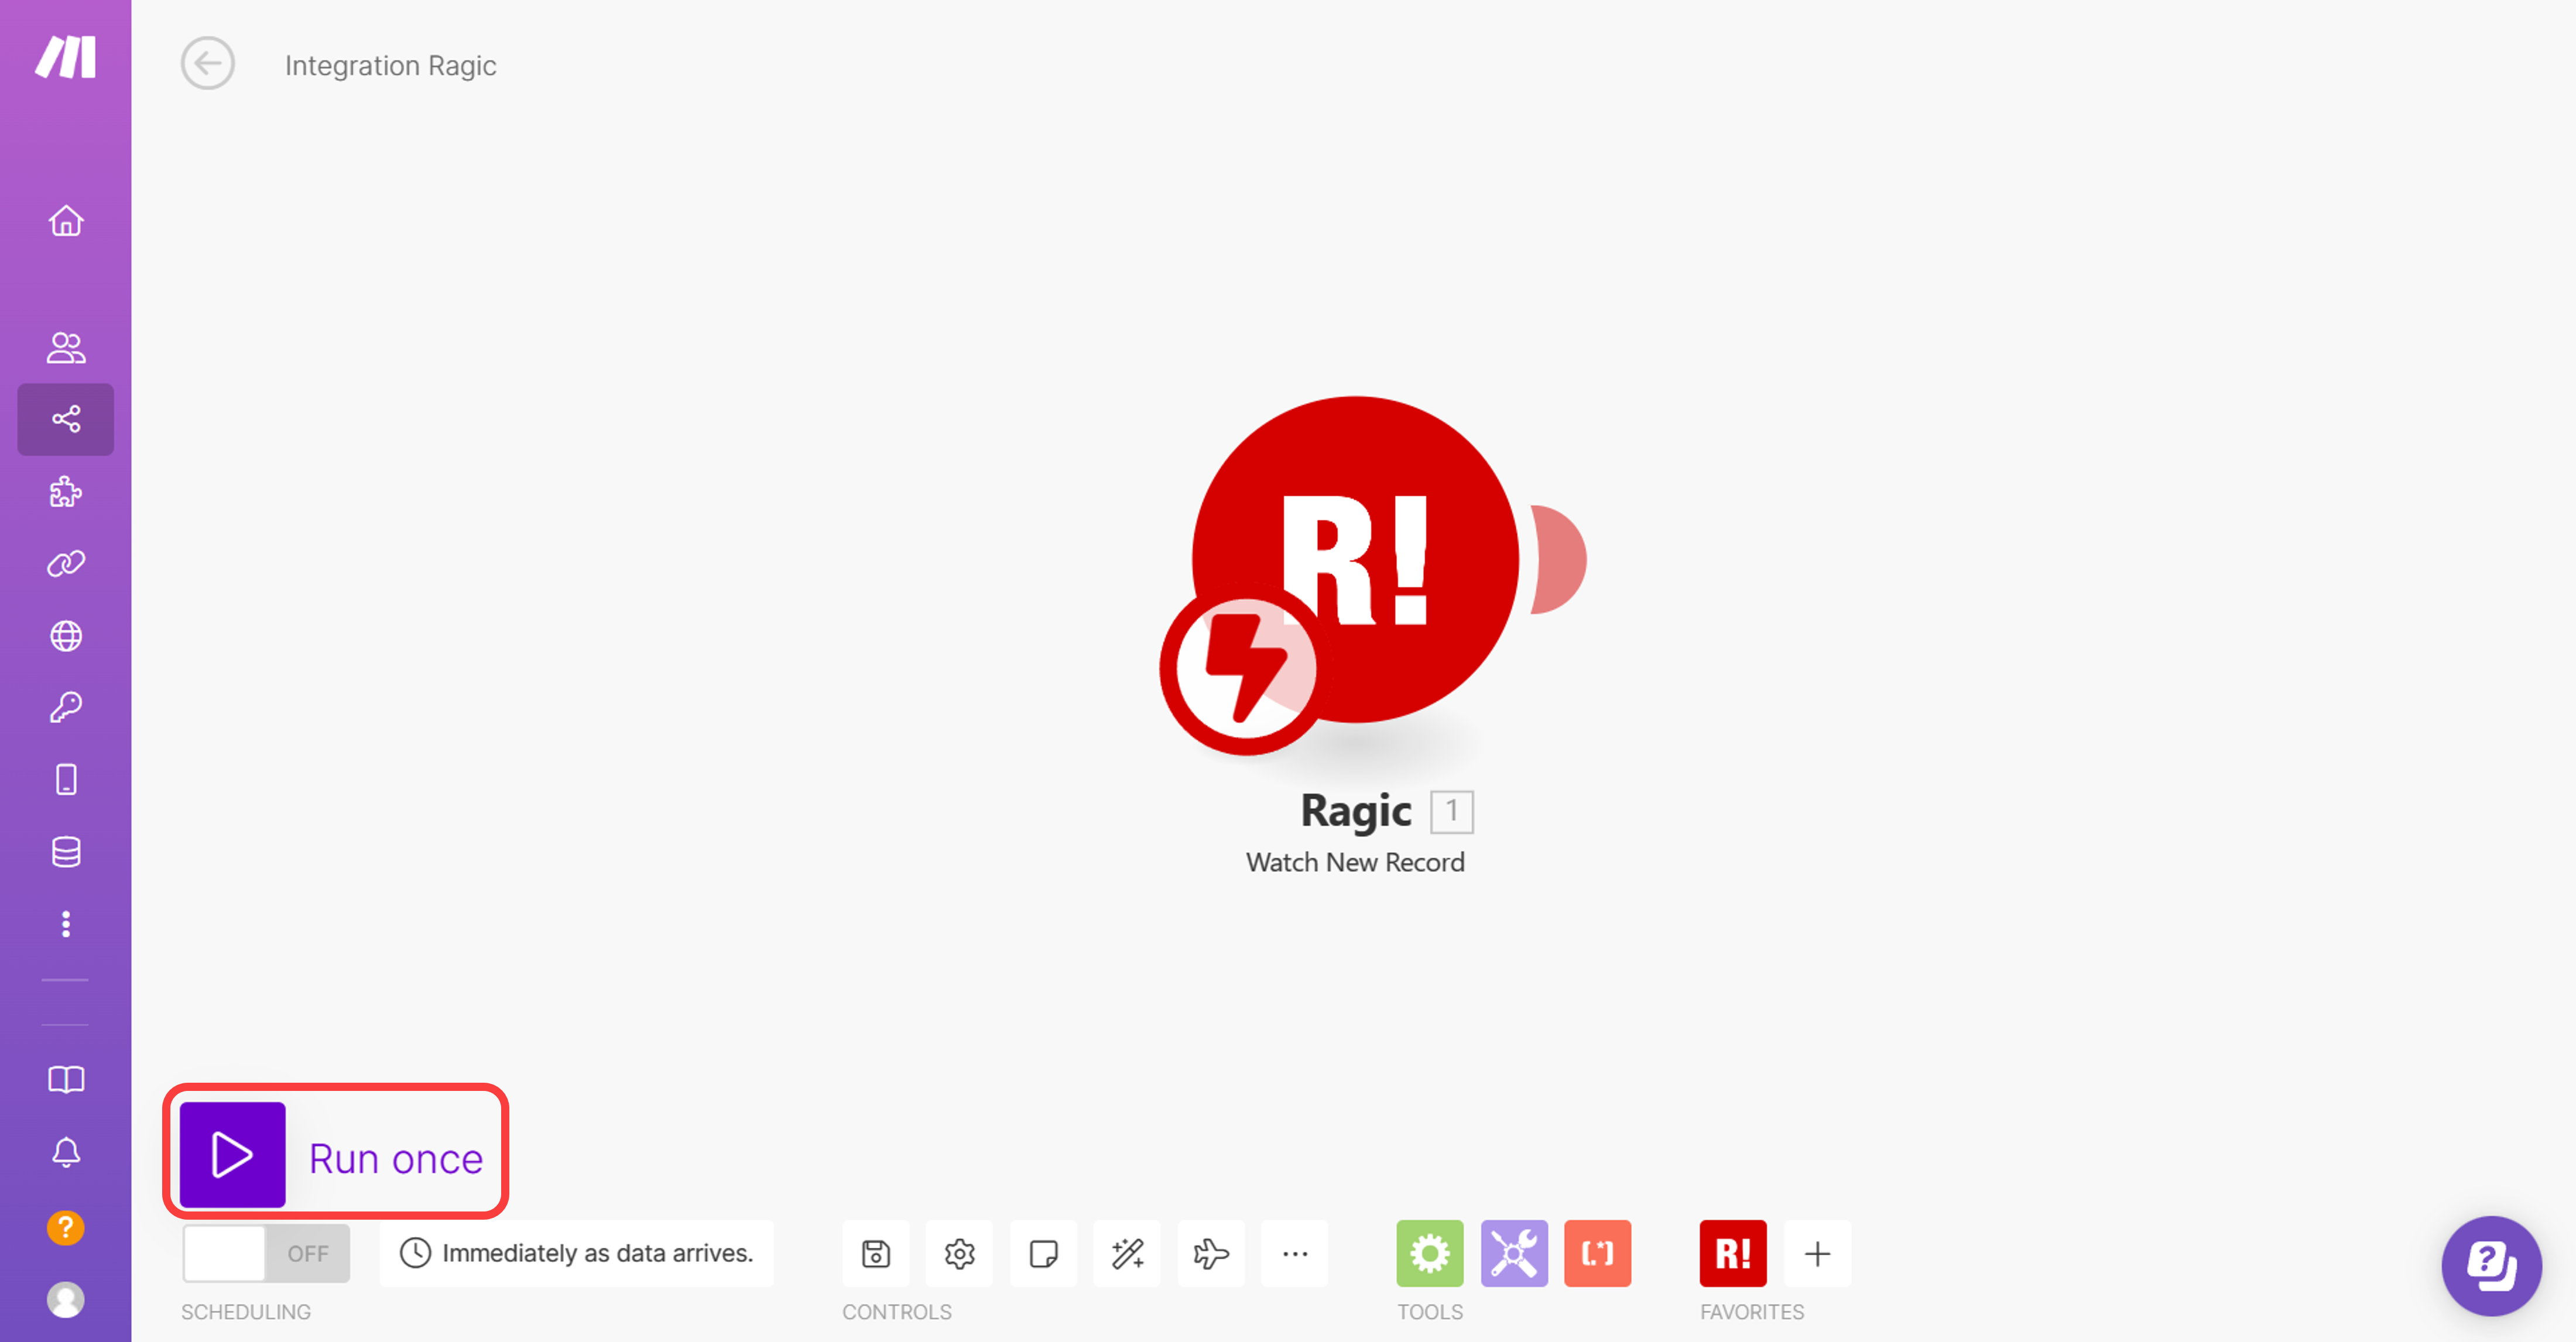
After that, create a new record in the Ragic sheet to trigger the Make scenario.
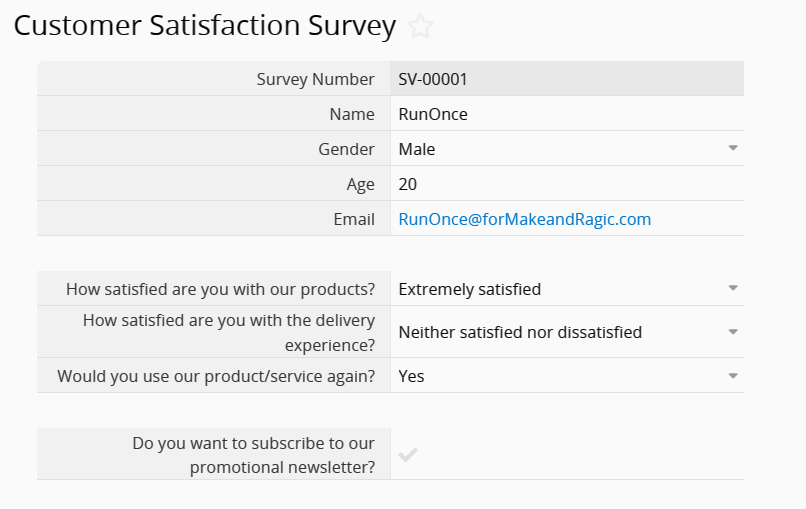
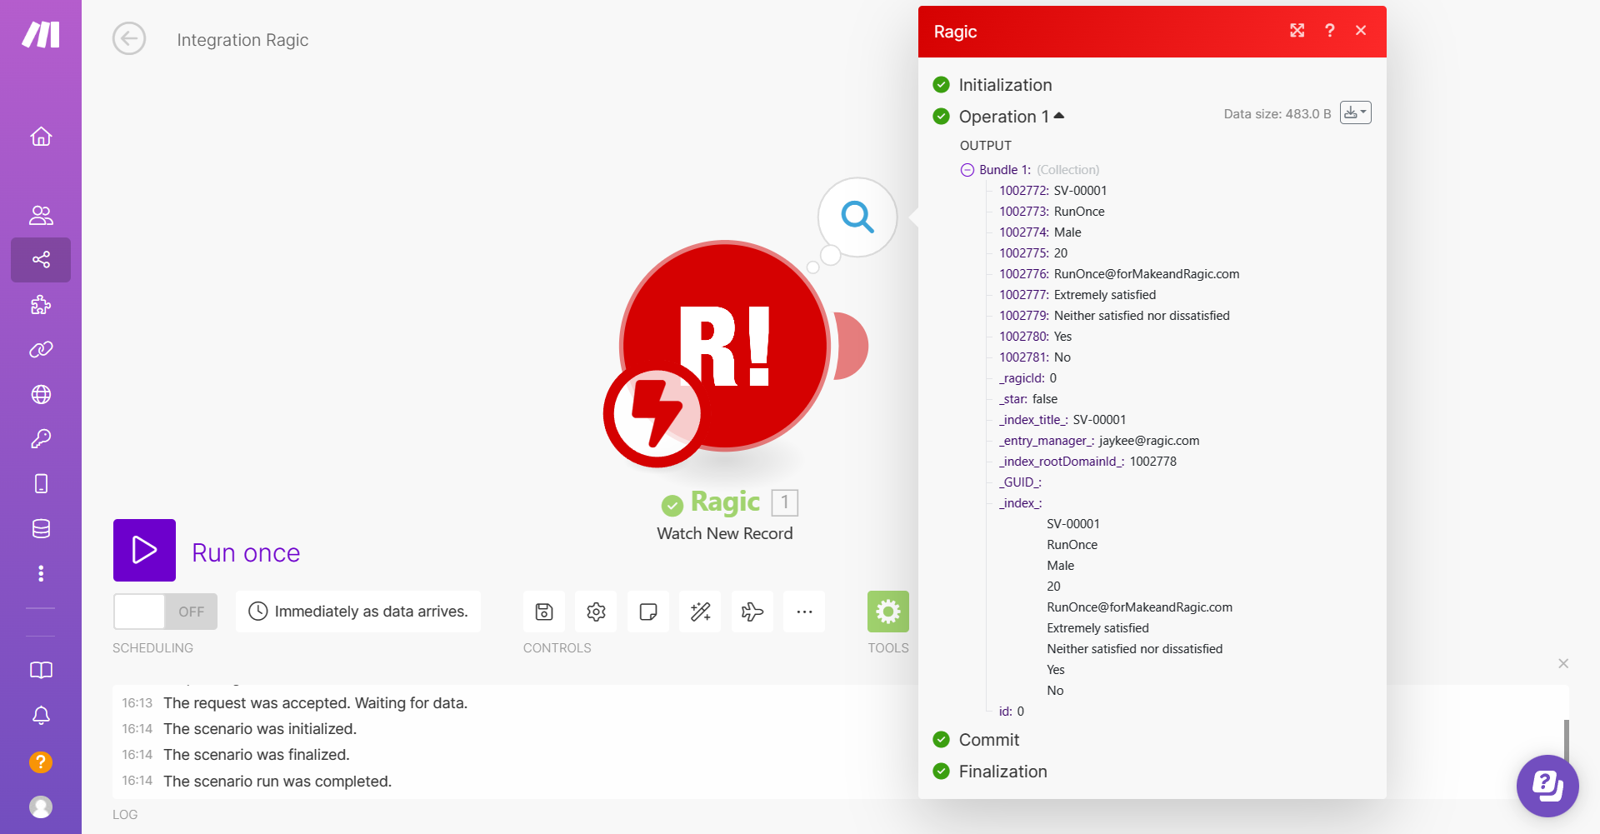
Save the entry and head back to Make, you’ll see the scenario has been triggered successfully, and the information such as the field IDs and values was retrieved correctly.
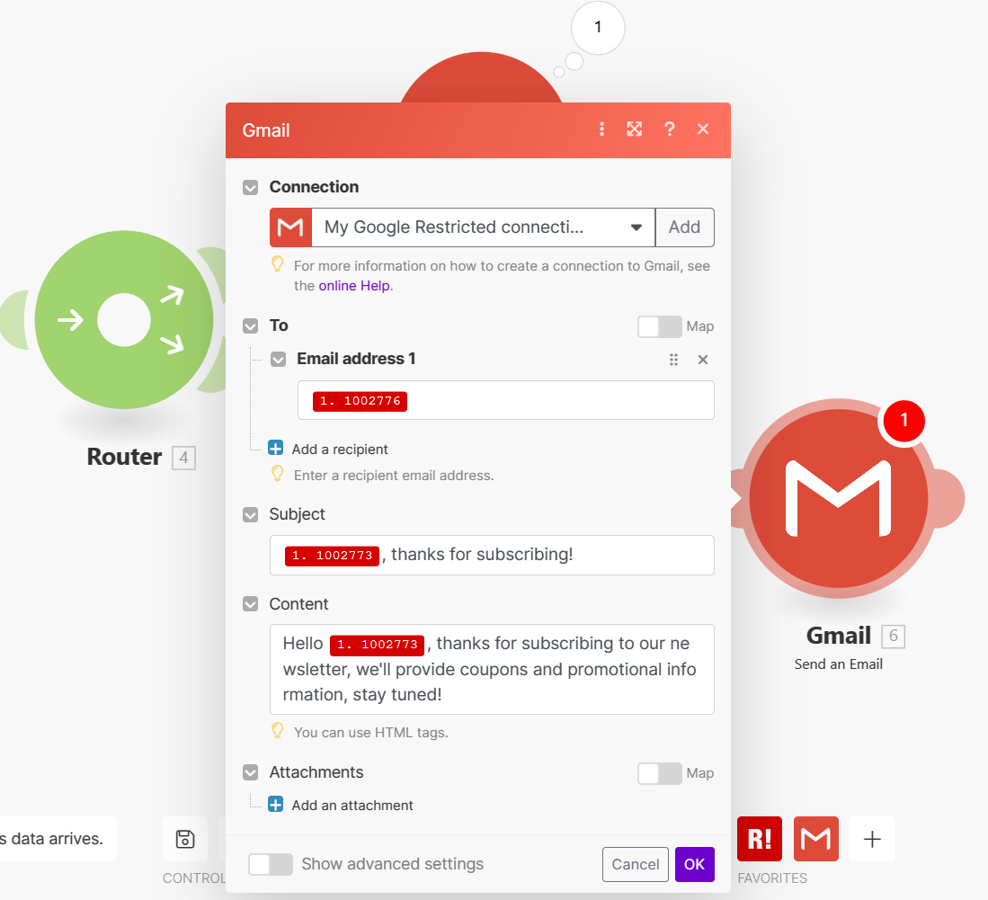
Since we need Make to automatically send an email when a new record is created, add an action module to send an email using Gmail.
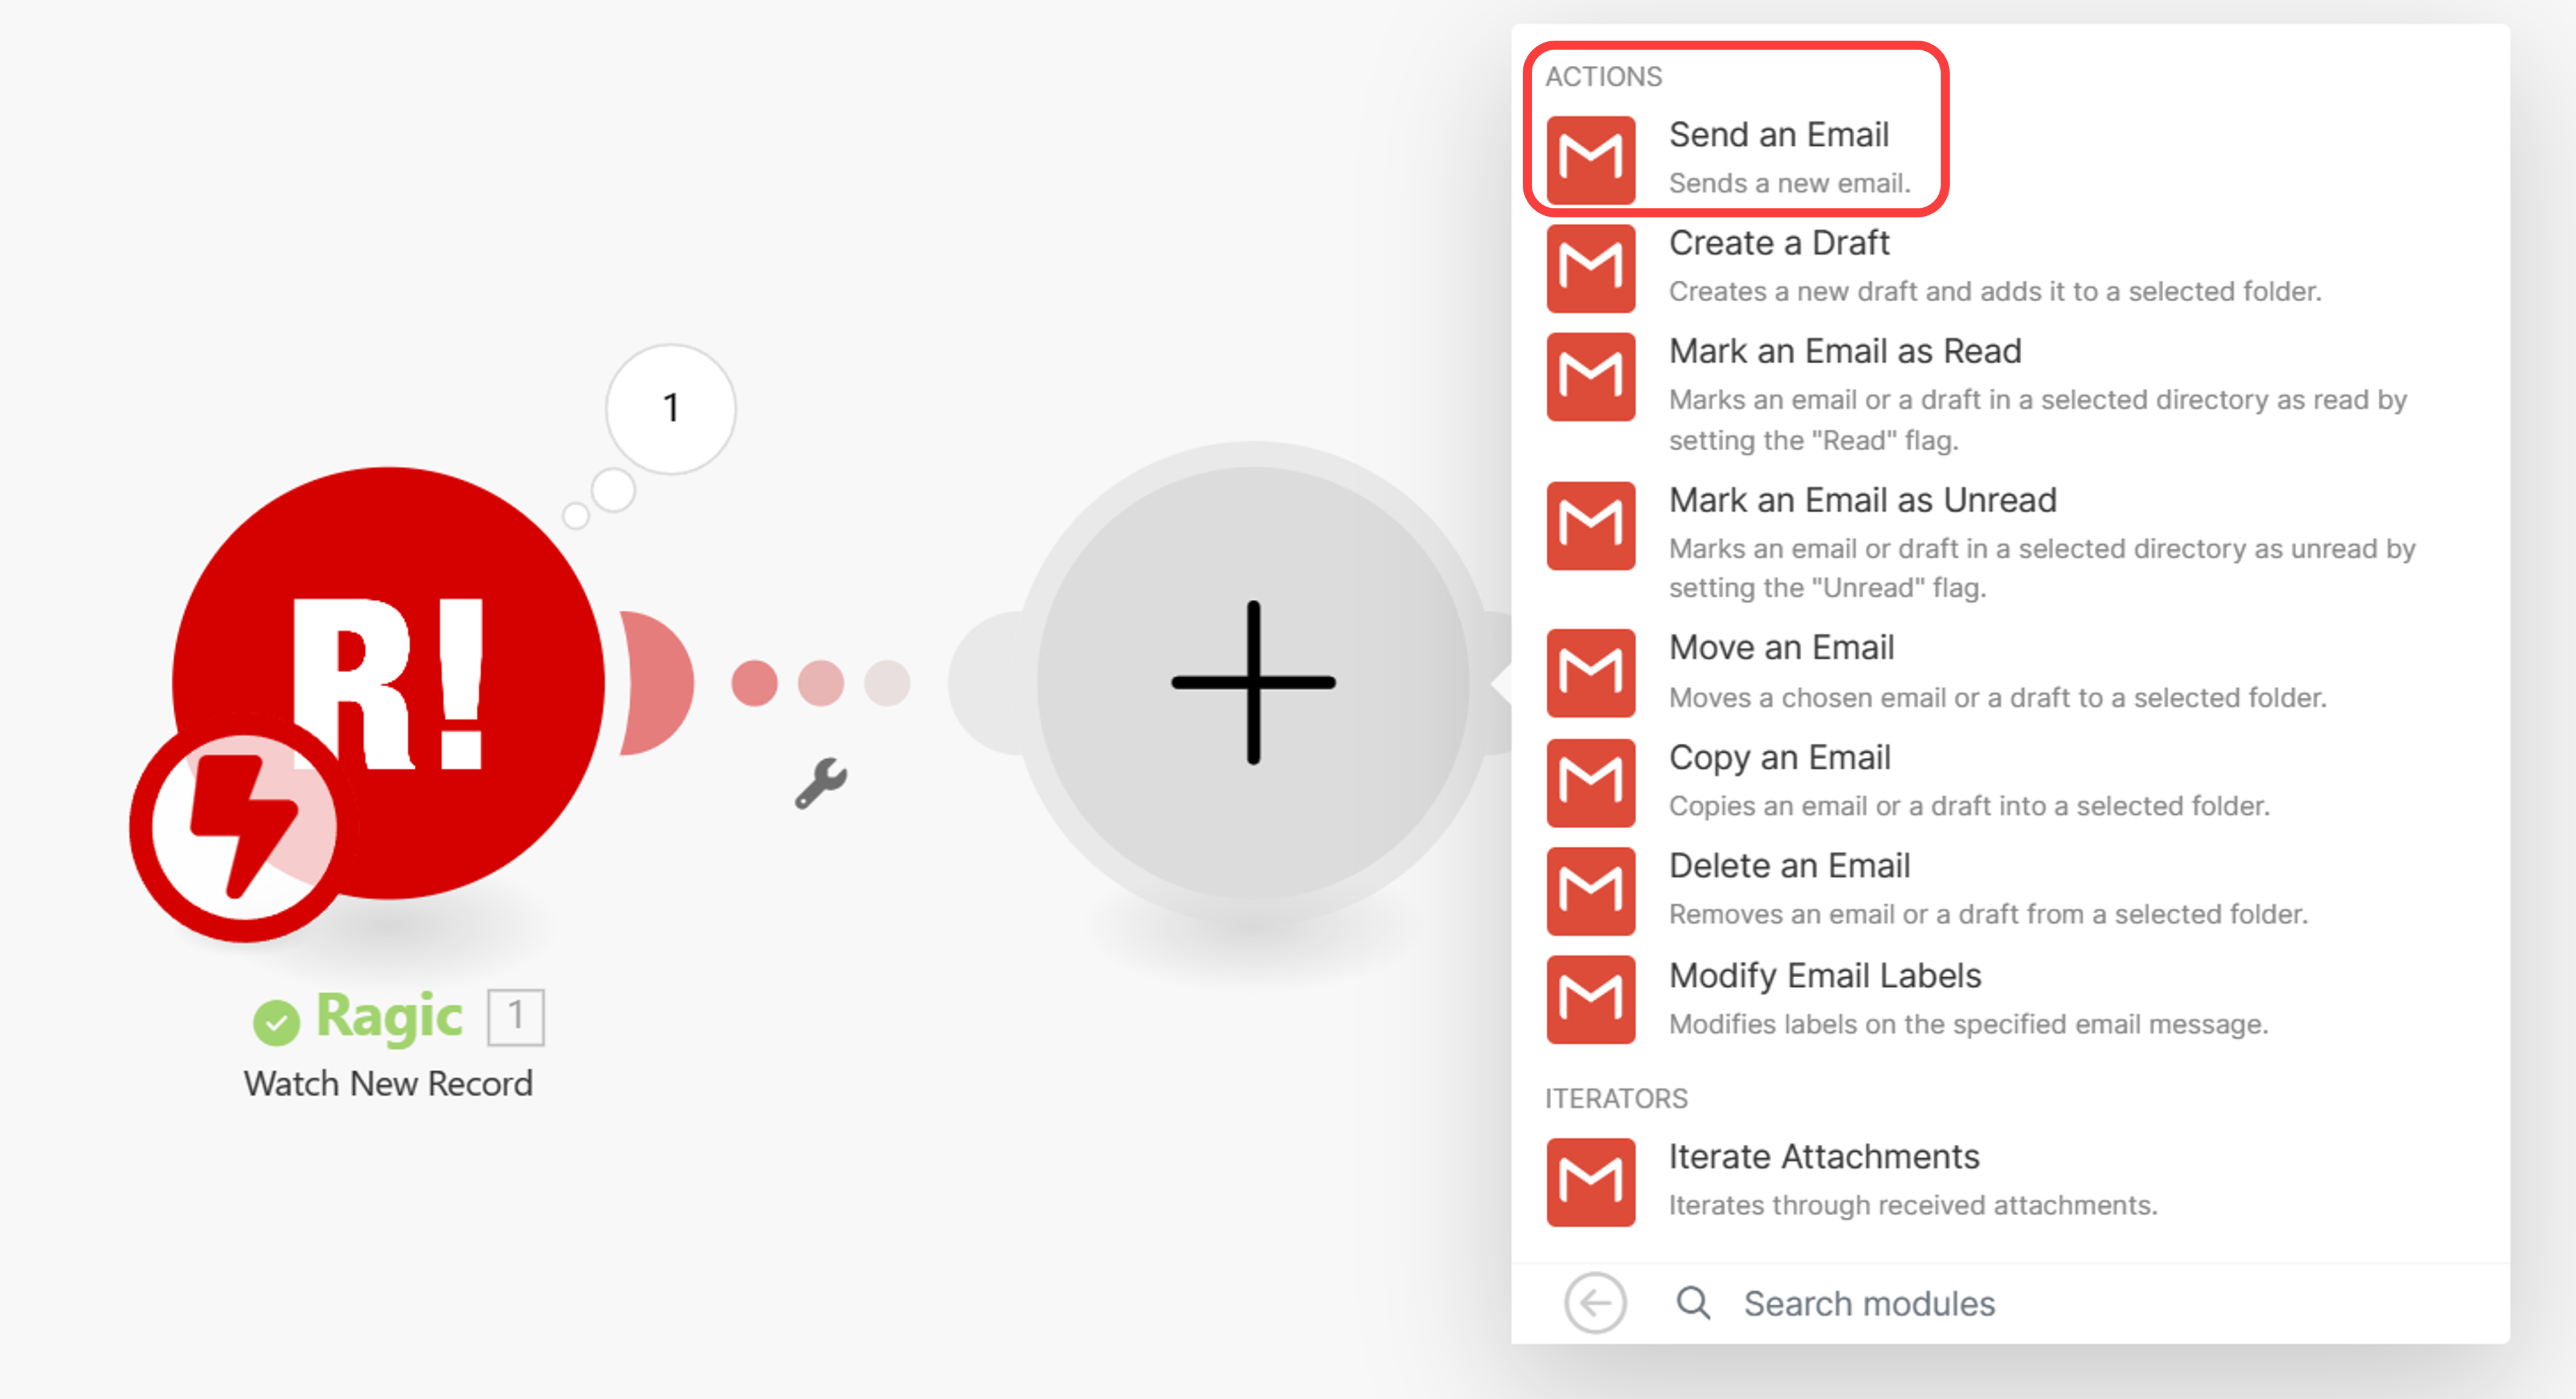
To make the module work, Make will ask you to connect to your Google account.
If you have a Google Workspace (formerly G Suite) account, we recommend you test with it. If you’re using a personal Google account, you must follow this article by Make to set up the connection.
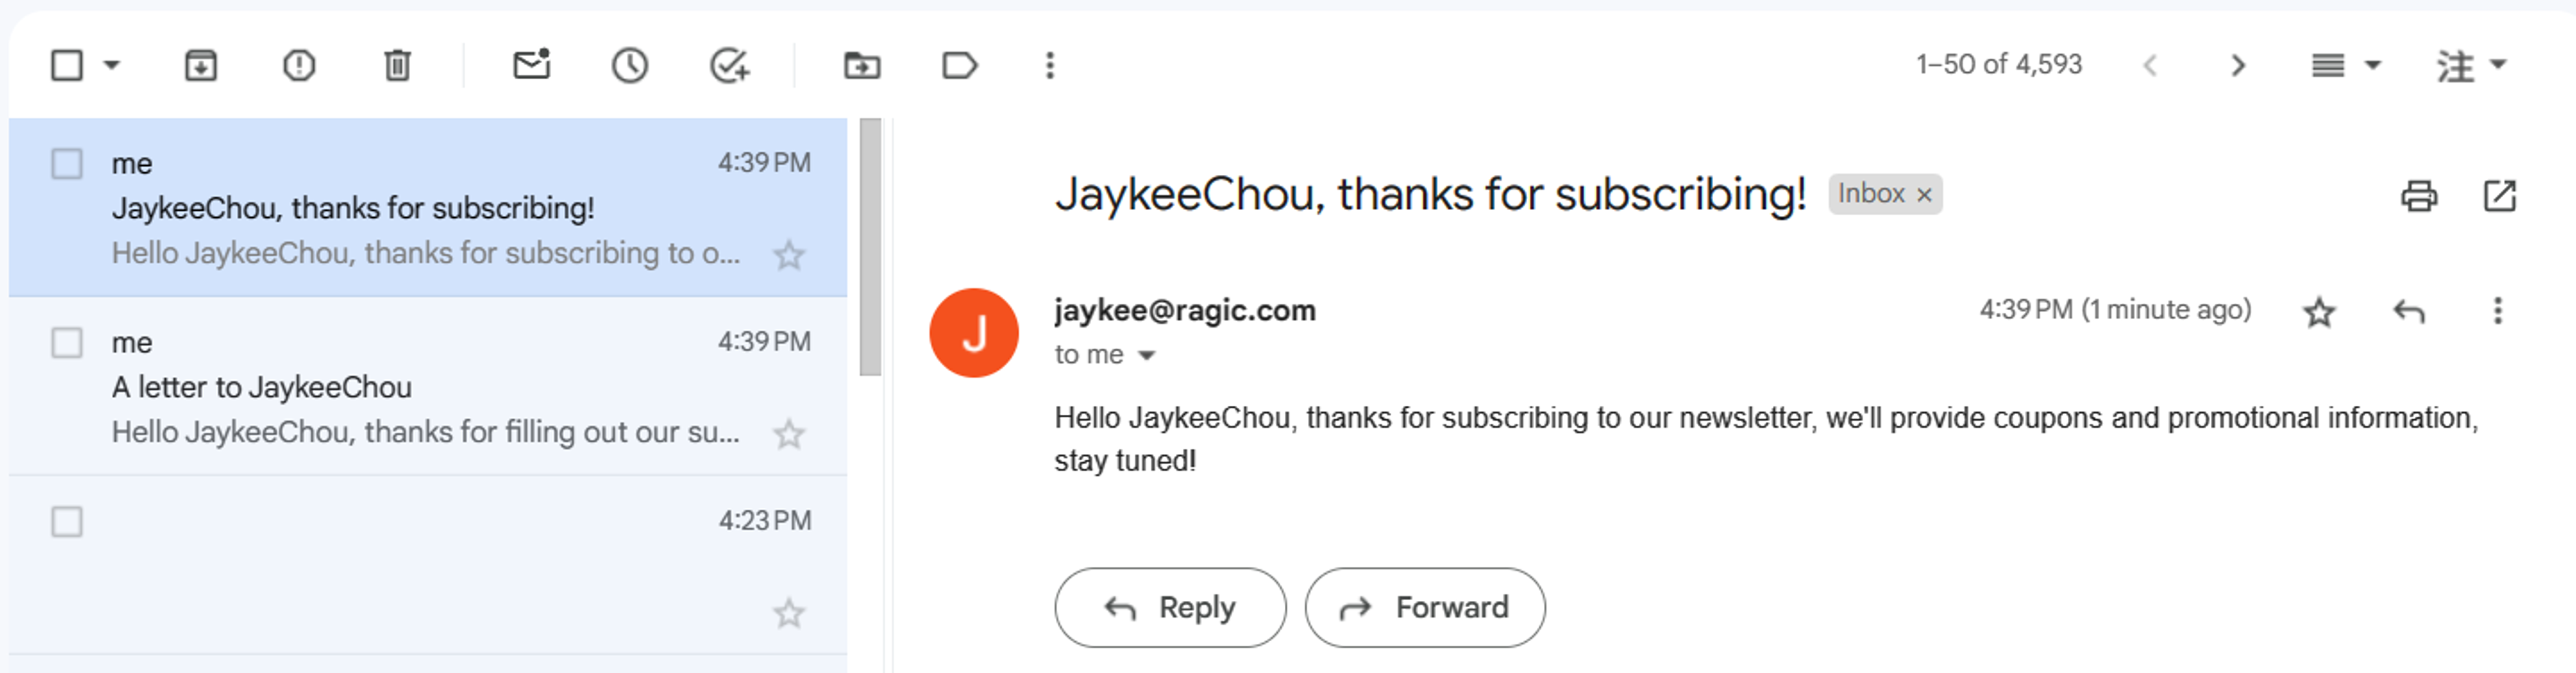
After connecting your Google account, you could start configuring the module, for instance, you may use the email address from the Ragic sheet and personalize the subject with the respondent's name.
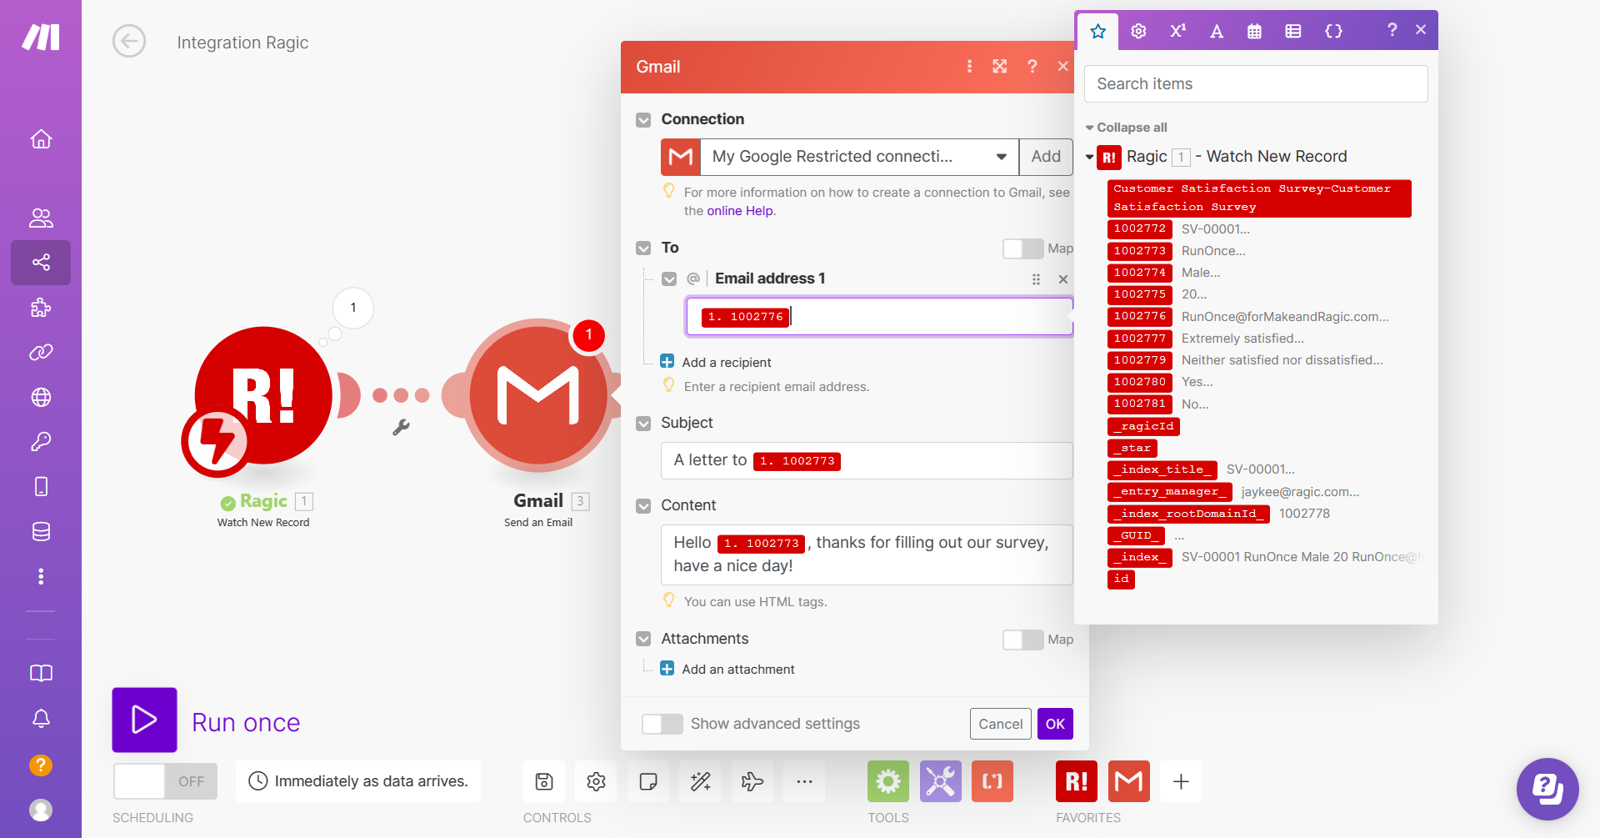
Rerun the scenario to test the email-sending process. First, click “Run once” and create a record in Ragic.
Returning to Make, the scenario should be triggered.
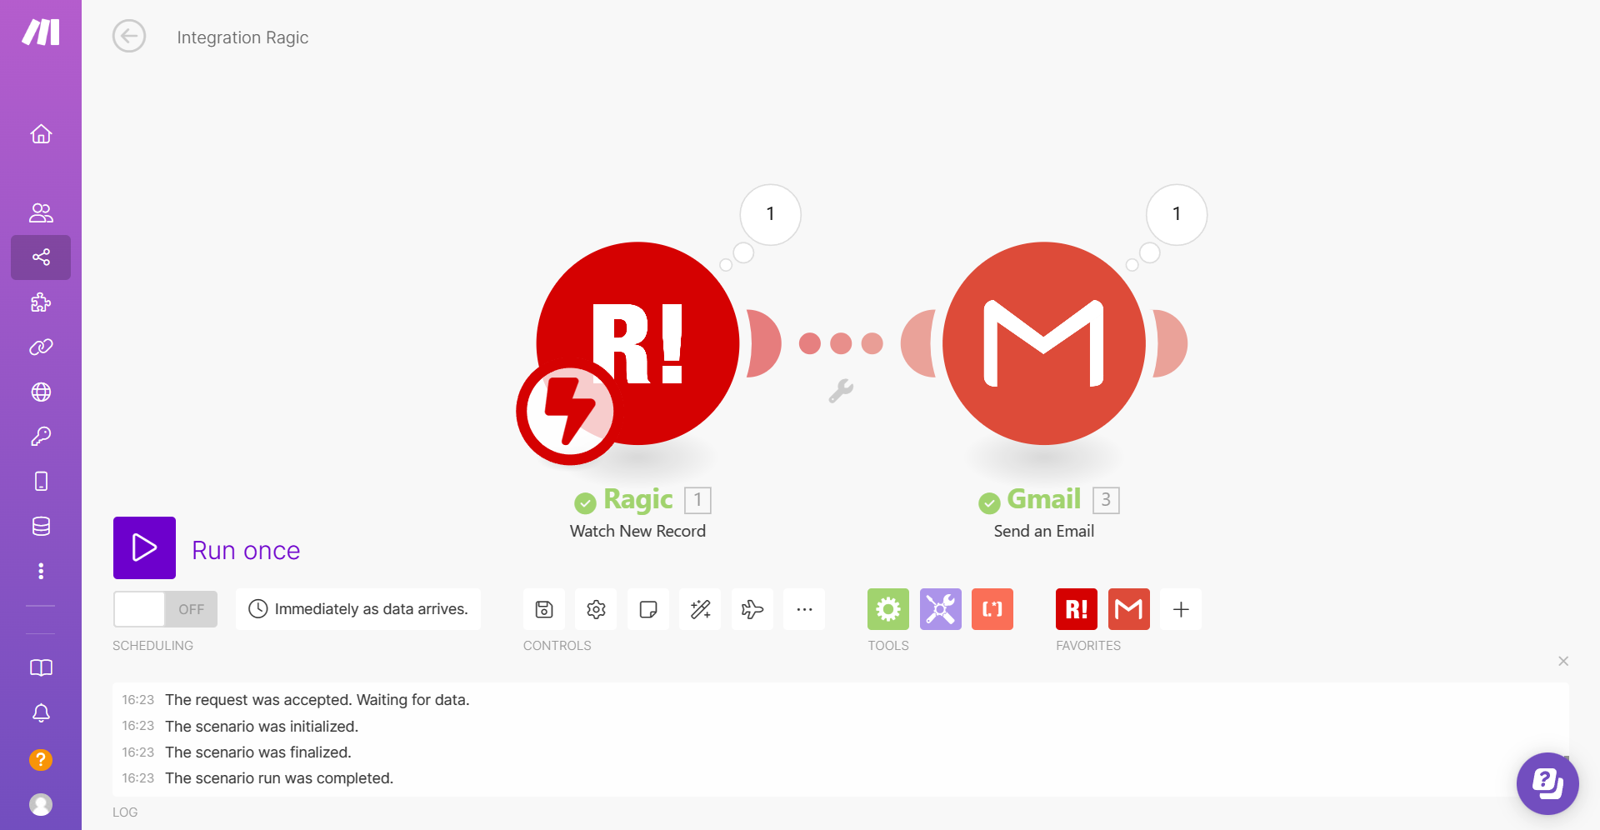
You could check the inbox to see if the email was sent correctly.
If you want to recruit members through the survey, design fields in the sheet to confirm respondents' consent. For instance, there's a field asking if they agree to receive a promotional newsletter:
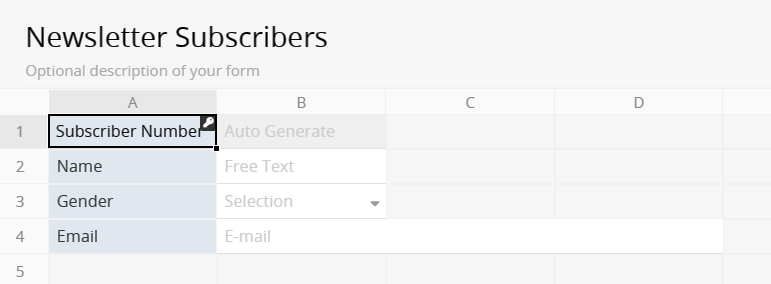
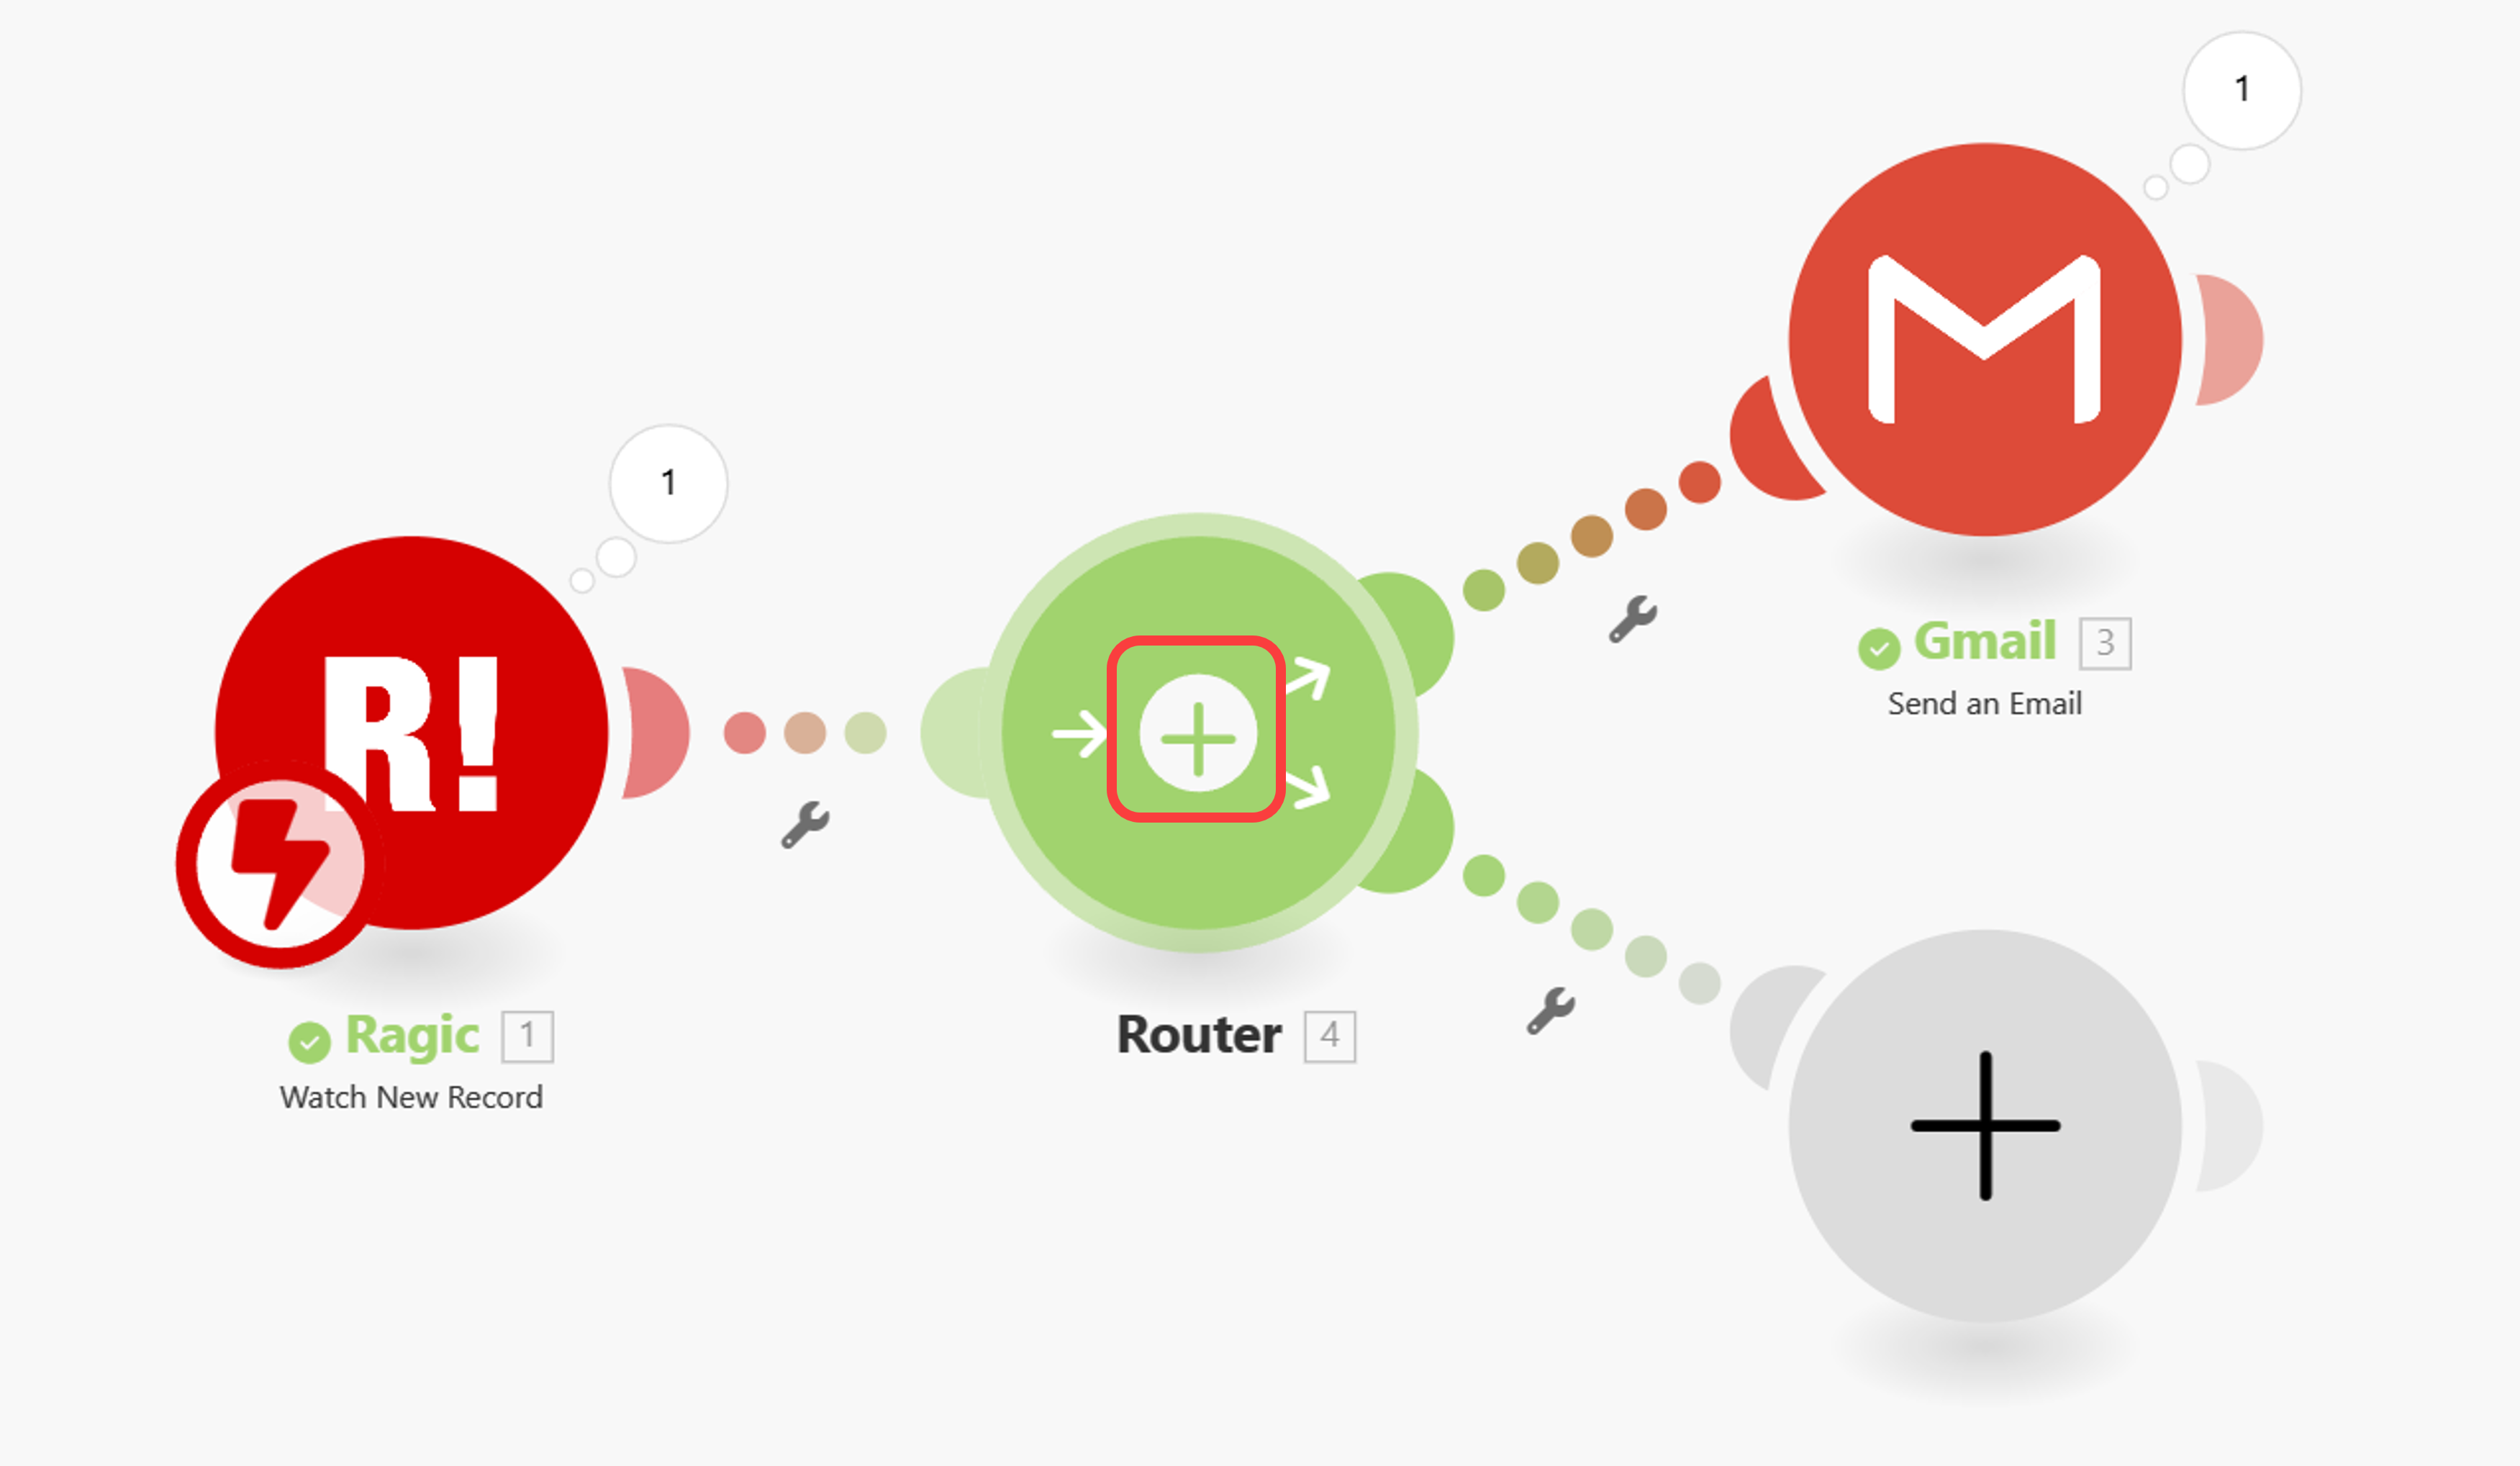
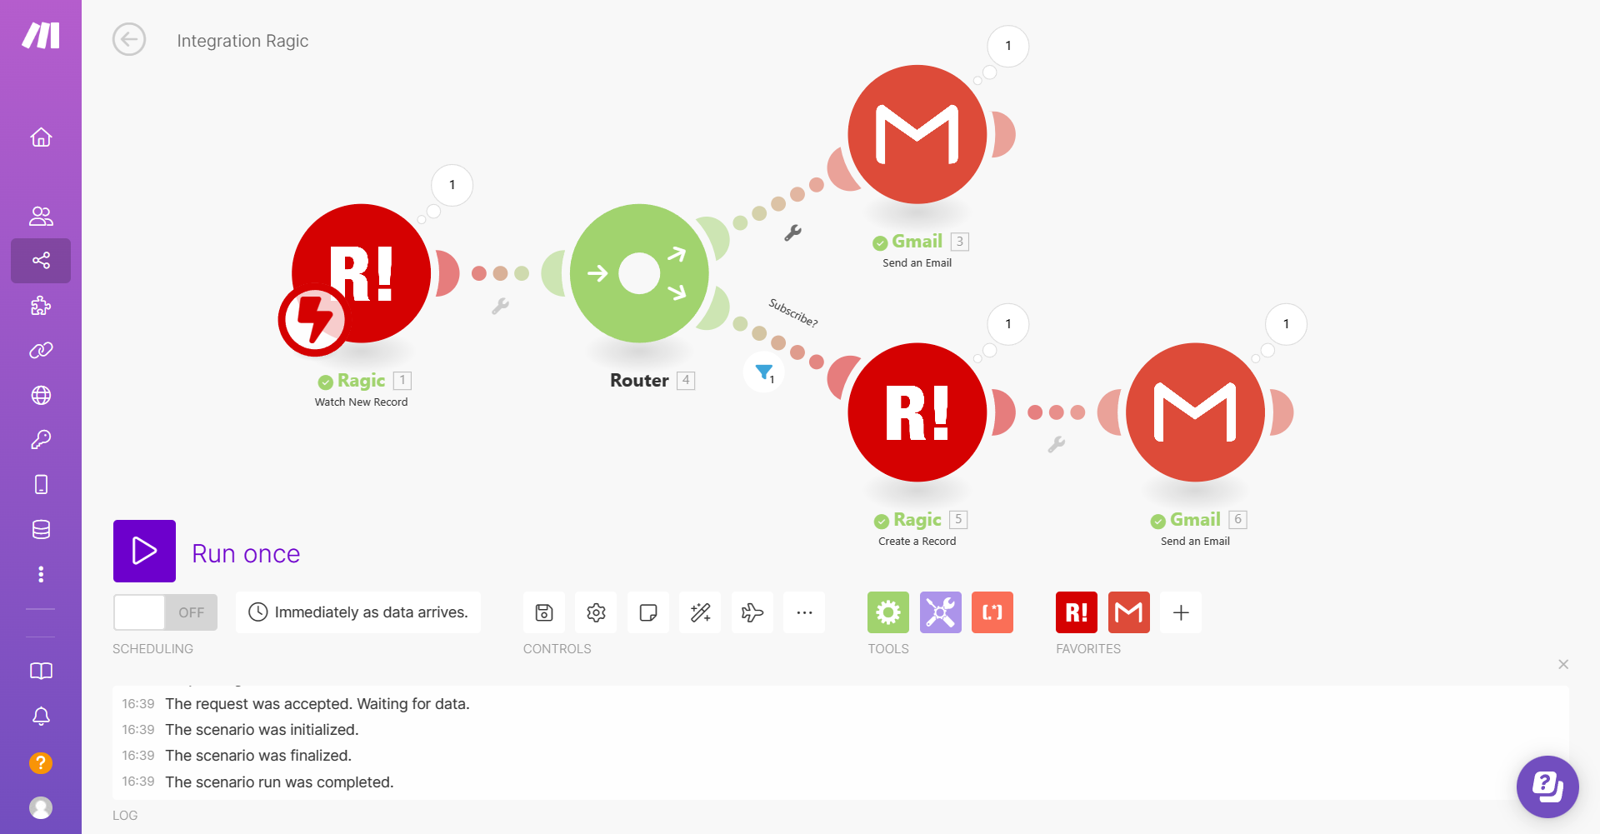
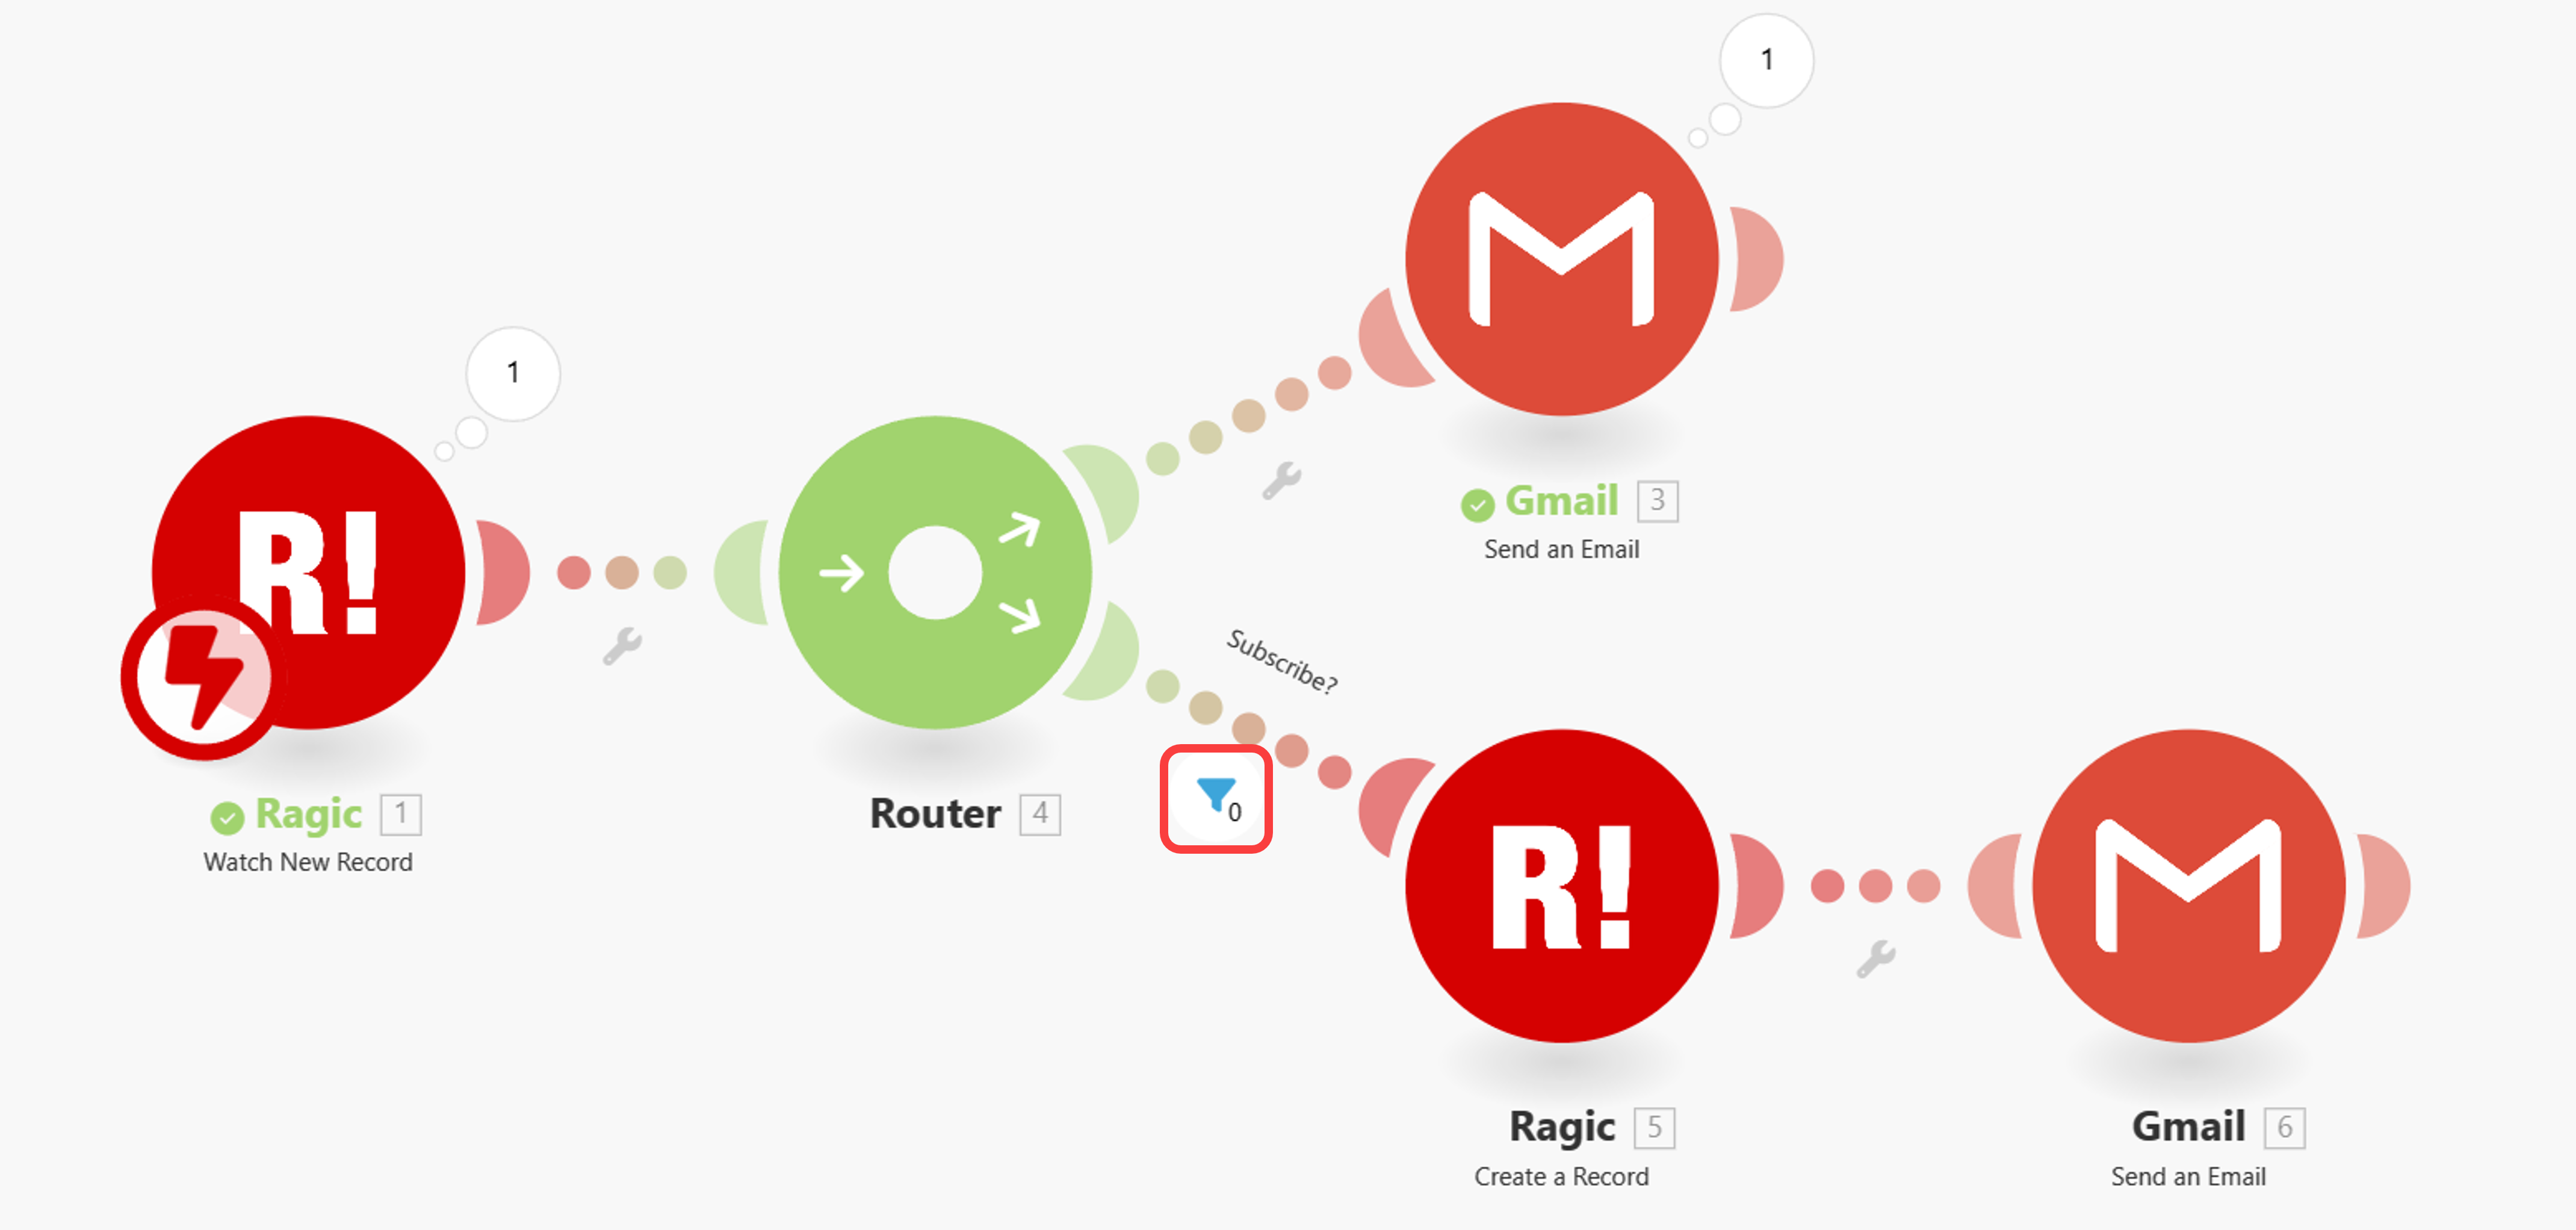
We could use the built-in router and filter in Make to create records automatically if the respondents agree to subscribe to the newsletter, you could design another sheet based on your needs.
Right-click on the connection line between the modules and select "Add a router".
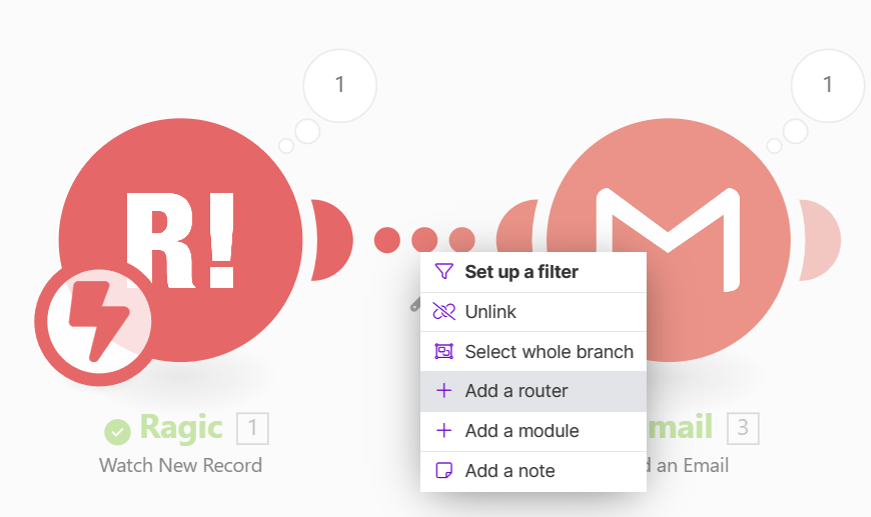
You could press the “+” symbol to add more paths to the router.
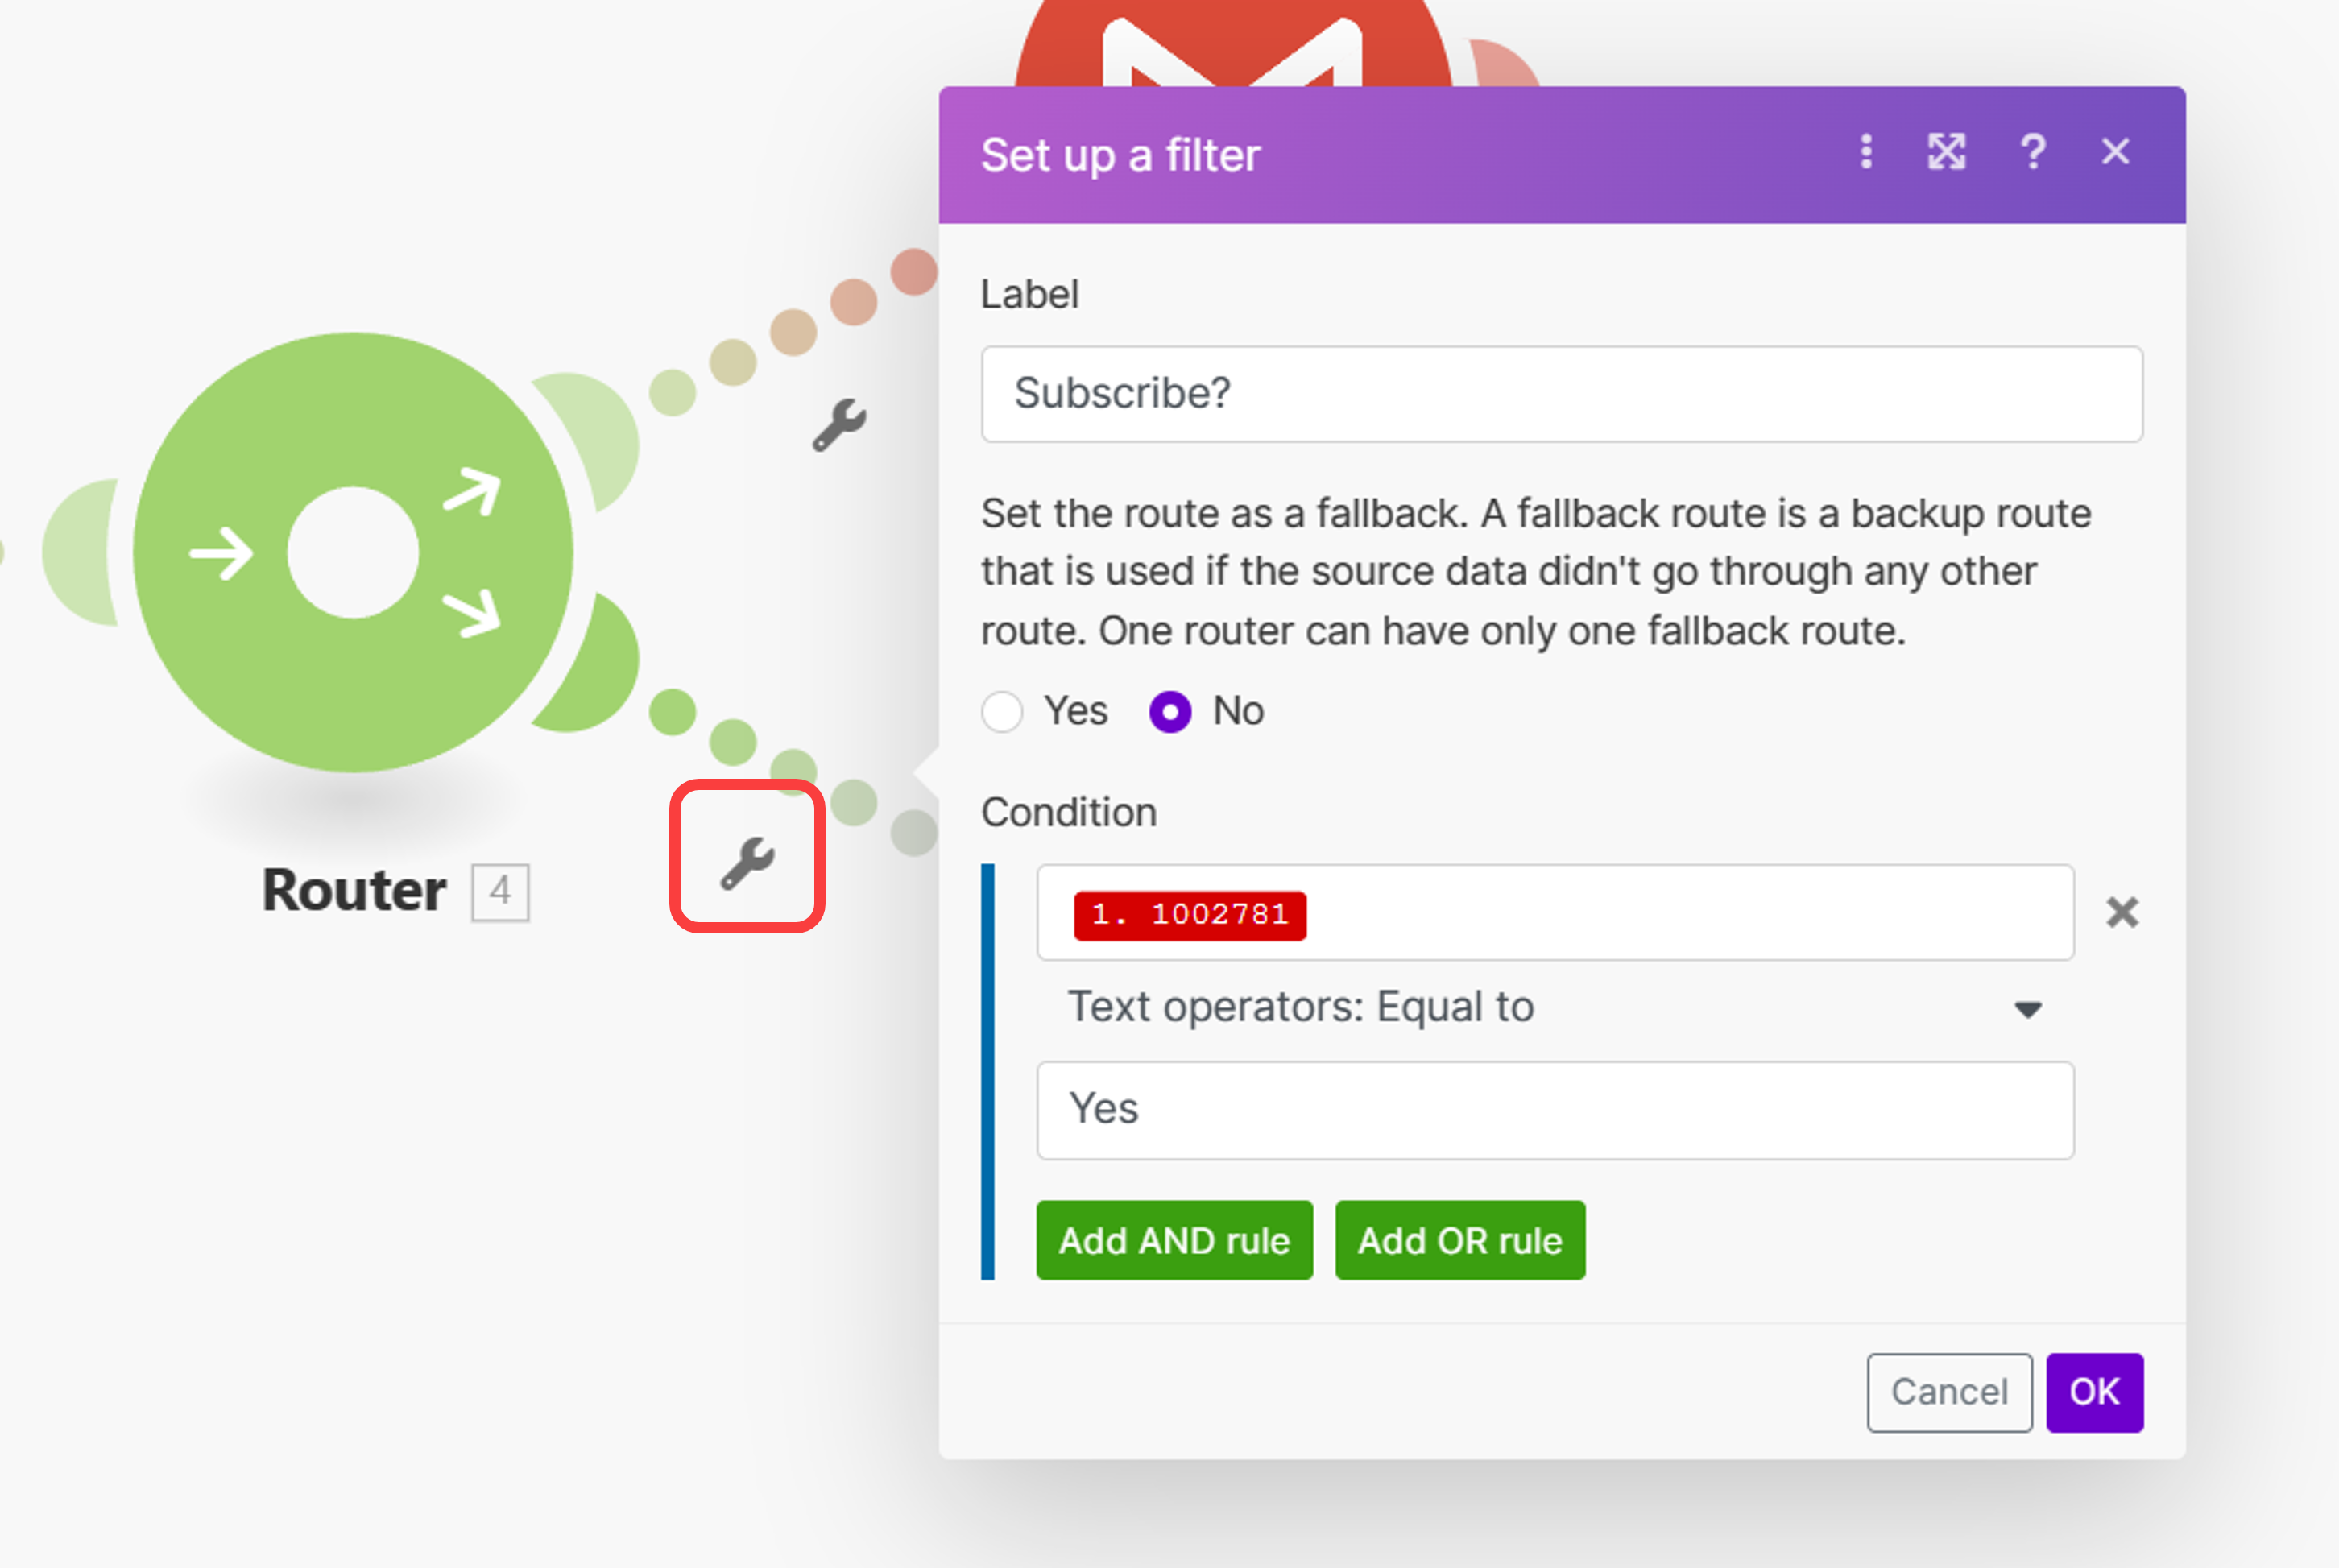
Define conditions to filter data based on user responses. For instance, the field asking for consent has the field number "1002781":
Since we want Make to create a record to another sheet if the field value is “Yes”, you may set the condition accordingly.
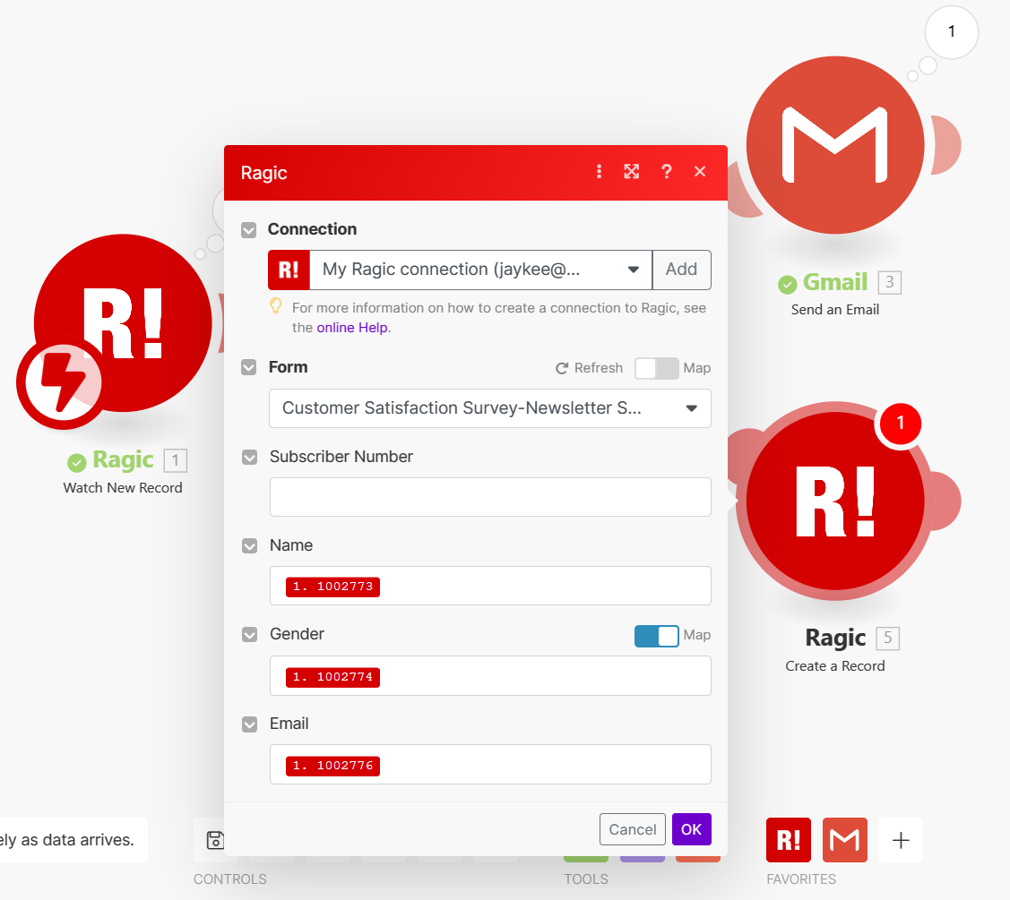
Add a new Ragic module and configure it to create records in another sheet.
You can also add additional actions to let the customers know that they’re successfully registered as members, such as sending another email.
After that, test the entire flow by running the scenario and creating a test record in the Ragic sheet.
Go back to Make and see if the scenario was triggered.
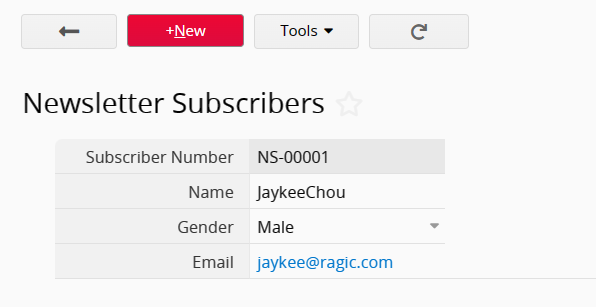
You can also see that the data has been saved correctly by going to the "Newsletter Subscribers" sheet:
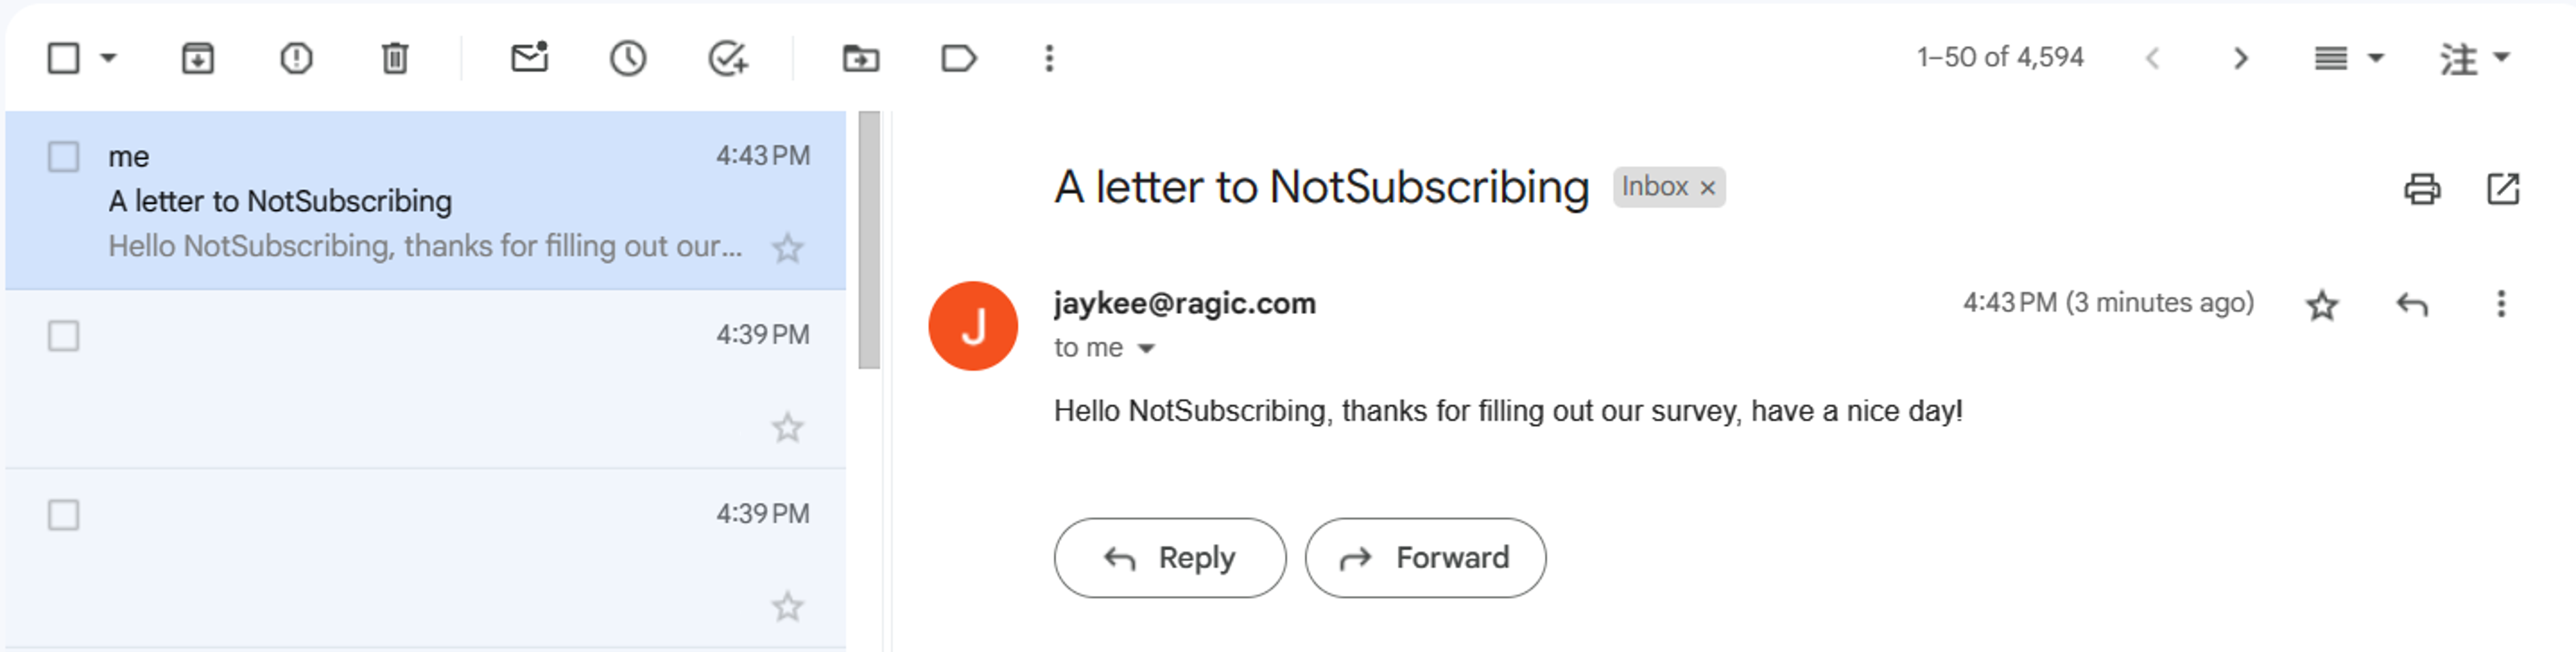
Check the inbox to see if both emails were sent correctly.
Also, you could try to create another record that shouldn’t trigger the additional actions to see if the scenario working properly.
Returning to Make, you can see that Gmail at the top has successfully sent the message, while the number below the filter shows "0", and the subsequent action module is not running, which means that the data has not triggered the record creation process:
Note: Make has usage limits called "Operations." The free version allows 1000 operations per month, and triggering modules always use 1 operation, but the usage for action modules depends on the "bundles" Make processes. Check Make's official document for more details.

